Saturday, December 17, 2011

Designer Rosette Die Angel

Thanks to the new Designer Rosette Die this sweet little angel was a surprisingly quick project.
Did you notice her wings???  They are made from the new white Waffle Paper and cut with the Elegant Bird Bigz Big Shot Die both of which will be available in the new Occasions Mini catalog.  So delicate and airy!!

The base is a styrofoam cone that is 2-7/8" diameter at the bottom and 5-7/8" tall.  I cut two strips of Twitterpated DSP with the Designer Rosette die.  Both strips were 12 inches long.  The red print was cut the full height so it has both decorative edges.  The blue underskirt was cut from a strip 2 1/2" tall.   A band of Cherry Cobbler seam binding cinches the bodice in at the top.

I used a 2 inch paintable styrofoam ball for the head and punched the eyes and mouth with the Owl Builder punch.  White gel pen highlights her eyes.  Her headband is 1/8" Marina Mist ribbon and the flowers are cut from the Twitterpated DSP.  As a final touch I twisted a bit of gold wire into a halo.   

Saturday, December 10, 2011

Pleating Ideas for New Designer Rosette Die

It felt like Christmas today opening my box of goodies from the pre-order of the Occasions Mini!  I have to say I LOVE the new papers and the accessories are going to be fun, fun, fun!

The only hard thing was deciding what to try first.  I have been mulling over a bunch of ideas for the Designer Rosette Die so I was anxious to see if they will actually work.  I am happy to report that the first two ideas were a success!  Not only that but now that I have worked with the die I have a stack of other ideas that I will have to experiment with.

The Designer Rosette Die is intended for making accordion style rosettes or "lollies" as they are sometimes called.  It cuts a strip of paper with two decorative edges and also scores the paper at 1/2" intervals.  (TIP:  You need to use a premium crease pad when cutting with this die to get the proper score  lines.  So the "sandwich" for stacking the plates is:  the die face up, the paper you are cutting, the premium crease pad and one cutting plate on top.)

My first idea was to use the decorative edge from one side and make a box pleated border.  The cool thing is a twelve inch strip folds up to perfectly fit on a standard size card.  CUTE!!!
I also used the new Labels Framelit Dies and the coordinating Apothecary Art stamp set.  The new Twitterpated designer series paper is scrumptious!!
I stamped the smallest stamp in Baja Breeze and cut it with the matching Framelit die.  (Tip:  After positioning the die over the stamped image, use a post-it note to hold it in place so it does not shift when stacking the cutting plates over it.)  Then I stamped the image again in Basic Gray, colored it with markers and punched it with the 1" circle die.

Here is close-up of the box pleats:
I sponged the edges is emphasize the pleats.

The pleats are so easy to do -- just fold on the score lines!
Starting from the left side fold on the score lines as follows:
1.  Mountain fold the first score line.
2.  Skip the next score line.
3.  Mountain fold the next.
4.  Valley fold the next.
5. Skip the next score line.
6. Valley fold the next.
7. Repeat all the way across the strip.

My second idea was to use the other decorative edge to make a fence using a more traditional pleating method.
If you have trouble seeing the pleating lines click on the picture to enlarge it.
The pretty paper is the Everyday Enchantment paper which will be available during Sale-a-Bration starting January 24.

Here is a picture to show this type of pleating:
 Starting from the left:
1.  Mountain fold on the first score line.  (This gives a nice finished look to the edge.)
2. Mountain fold the second score line.
3. Valley fold the next.
4.  Skip the next score line.
5.  Then do mountain, valley, skip across the strip to the end.

Thursday, December 8, 2011

Christmas Card Box

I needed a gift box for the last few cards I had made so this was tonight's project.
I used a tutorial from Spiltcoast Stampers for the basic box.  (The tutorial can found here.)  I added a piece of plaid paper cut with the Top Note die which does double duty as a focal point and as a flap on which to add a velcro dot to keep it closed.
The four cards were a bit bulky with all the embellishments so this box worked well... all the cards plus the envelopes fit nicely inside.

Wednesday, December 7, 2011

Frostwood Lodge Christmas Cards

Two more Christmas cards today.
There have been lots of cute fireplace cards on stamping blogs and websites this season and I thought it would be fun to try a version myself.  I love the plaids and checks of the Frostwood Lodge DSP for this.

I'll give the dimensions I used.   (It helps me to remember too incase I would like to make another one!)

1. The card base is Cherry Cobbler cardstock 4-1/4" X 11", scored at 5-1/2"
2. The plaid floor is 1-1/8" X 5-1/2".
3. The fireplace is Early Espresso 3" X 4", dry embossed with the Lattice folder
4.  The fireplace opening is punched out using the 1-3/4" Circle punch.  (with the edges trimmed a bit to create the sides.)  Black cardstock backs the opening.
5.  The mantle is 3/4" X 4-1/4".
6.  The fire is Daffodil Delight punched with the Bird Builder punch and sponged with Cherry Cobbler ink.
7.  The logs are DSP punched with the Word Window punch
8.  Stockings use the Stocking Builder punch.

The next card was inspired by one Twila Davis did for the blog hop.
The velvet ribbon is bordered by two score lines to set it apart.

Monday, December 5, 2011

Velvet Ribbon Candy Cane Holder Tutorial

I hope you enjoyed the Up On the Rooftop Blog Hop this weekend!  The Blog Hop website will remain open so you can still access all the tutorials for the designer's projects if you have not already.  Please see the bottom of today's post for the winner of the Blog Candy.

Today's project is a candy cane holder that would be a pretty accent on the table at your Christmas gathering or it could be a small gift.  It has lots of texture with velvet ribbon, embossed holly leaves and glittery Glimmer Paper berries.

Step by step directions:

1. Use any small round container as the base.  I used an empty tea can which is 5 inches tall and 2-1/2" in diameter.   Remove any paper from the can.
2.  Apply Sticky Strip in vertical rows around the can.  At the seam use a double row of sticky strip touching each other so there is a place to stop and start the ribbon.
3.  Measure around the can and cut lengths of 3/8" Very Vanilla Velvet Stitched Ribbon.  Starting at the bottom adhere the ribbon one section at time around the can.  Add rows of ribbon until it reaches the top.
4.  Die cut holly leaves using the Stocking Accent Die.  I used 14 on my can.  Dry emboss the leaves using using the Lattice embossing folder.  Run a stylus down the center of each.  Bend on the score and shape the leaves over the handle of the stylus.
5.  Apply Crystal Effects to the seam line where the ribbons met.  Arrange the leaves in groups.  I had three groups of leaves for this size can.
6.  Punch leaves using the Bird Builder punch and glue those in between and around the holly leaves.
7.  Punch holly berries using the circle punch from the Itty Bitty Punch pack and adhere them to the center of each holly leaf grouping.
Materials used:  Garden Green cardstock, Red Glimmer paper, 3.8" Velvet Stitched ribbon, Sticky Strip,  Crystal Effects, Stocking Accents Big Shot Die, Lattice Embossing Folder, stylus from Simply Scored Tool, Bird Builder Punch, Itty Bitty Punch Pack.

And now for the BLOG CANDY WINNER.  I used random.org to generate a number.
The result was 33.  The 33rd comment posted was by Joan Brenizer!!  Joan please email me at kittystamp7@yahoo.com with your mailing address.   Congratulations!

Friday, December 2, 2011

Up On the Rooftop Blog Hop

Welcome to the UStamp with Dawn and Friends!! Up On The Roof Top 2011 World Showcase Holiday Blog Hop.

If you have been following the Blog Hop from the beginning, you have just been wowed by Nancy Horn's Photo Cards.  Wasn't that a perfect way to share your family photo??

If you are just joining the Blog Hop, no problem, as you can start at any point.  All the Designer's Blogs are linked together so you will be able to see ALL the FABULOUS projects we have for you.
My project is a Holiday Window Box display.  At the local craft store, I noticed a cute wooden window box.  The rustic style made me think of the warm and cozy Frostwood Lodge Designer Series paper, so I cam home and recreated it in paper!
The windows are made of vellum allowing the light to shine through and the Winter Wishes Stitched Felts coordinate perfectly with the colors of the DSP which adds to the cozy theme.
The Stocking Accent Big Shot die is used on both the window box
and the matching peekaboo window card.
It has its own mini window box!
The inside flap lifts so the writing area is hidden when the card is closed.

As a Special Thank You for stopping by my blog I am giving away BLOG CANDY!!
Please leave a comment about my project to be entered for a chance to win a great goodie bag of current
Stampin' Up! products.  I will randomly select a winner to be announced on Tuesday, so please check back to see if you are the lucky recipient!

AND there's MORE....LOTS MORE!!

  • You have the opportunity to get the downloadable PDF Tutorial for my project FREE!! It's a GIFT from UStamp with Dawn and Friends!!  Woohoo!! See the blinkie below to access the FREE Blog Hop Website.
  •  In the Spirit of the Holiday Season, you have the opportunity to get in on "Special Holiday Pricing" for the upcoming UStamp with Dawn and Friends!! SCORE!! Event.  The Stampin" Up! Simply Scored Tool is HOT STUFF and SCORE!! will feature 40+ projects, all created using the Simply Scored Tool.  SCORE!! is a MUST NOT MISS Event!! See the blinkie below to join and get in on the Early Bird savings.
And now for the most exciting giveaway of the season...
Everyone that joins the new and exciting upcoming event - SCORE!! - with " Special Holiday Pricing" will be entered into a Drawing to win 1 of 3 Free Passes for an ENTIRE YEAR of UStamp with Dawn and Friends!! events!!
YES!!
You read that right!!
YOU could win a whole year of UStamp with Dawn and Friends!! events FREE!!

***Special Holiday Pricing of just $19.99 ends Dec 8th***

Winners will be announced on Friday, Dec 9th.
Click the Blinkie below to join SCORE!! with Special Holiday Pricing
and a chance to win a FREE Year of UStamp with Dawn and Friends!! events!!

 
Click the blinkie below and will be taken to 
THE UP ON THE ROOFTOP BLOG HOP WEBSITE!!

Of course it's ***FREE*** to join and 
there you will find the tutorials all ALL the blog hop projects,
PLUS live chats, challenges and more prizes!!

You will even have an opportunity to be considered for a spot as a Guest Designer!!
Yes!! It is all FREE, so tell all your friends and 
Join the fun with UStamp with Dawn and Friends!!

***

AND last but certainly not least, it's time to hop on over to the next Designer's Roof Top, so please click below for the NEXT BLOG, where you will find Tanya Boser ready to share a delightful Holiday project with you.

If you would like to hop back to Nancy's Roof Top, please click below.


Thanks again for stopping by and Happy Holidays to YOU!! 

Tuesday, November 29, 2011

Merry Mittens and Announcing Up On the Rooftop Blog Hop

Well, the first snowstorm of the season has arrived in a big way.  The snow is coming down fast and it is time to get out the mittens!
These miniature mittens are from the Winter Wishes Stitched Felts found in the Stampin' Up! Winter Mini Catalog.  Such a fun way to add a bit a fabric to a card.   Now I need to look in the closet for the real thing!

And if the snow doesn't get you in the Holiday mood I know something that will.... UStamp Designers are putting on a Blog Hop starting this Friday and running throughout the weekend.  The Up On the Rooftop Hop will feature Christmas projects each with a free tutorial.  There will be blog candy on the designer's sites and prizes and chats on the main World Showcase site.  See you then!!


Thursday, November 24, 2011

Pleated Blossom Box Give Thanks

Another idea for using the blossom box is to use a single section as a 3D background.  
I folded it (as in THIS POST for making a full circle accordion flower) and added a cardstock stand at the back so it would not tip.  The stamped images are from the 2-Step Gently Falling set and the sentiment is from Hand-Penned Holidays.  Super quick!! 

Thursday, November 17, 2011

Quiet Evening Collection

With cooler weather it sounds so nice to curl up with a cup of tea, a good book and a bit of chocolate.  I had that in mind when I designed this gift set for Knock Out Punches at UStamp.
It has a bookmark portfolio with reading list, tea bag holder, chocolates and a matching card.  The Mocha Morning Speciality paper adds elegance with flocked designs and a touch of gold making it a lovely gift for a teacher, co-worker or friend.

The tutorial is available HERE.

Friday, November 11, 2011

Bluebird House and Card Set

The Knock Out Punches session of UStamp is a definitely a winner!  My head is spinning with all the super ideas the designers have been sharing.   Oh to have time to recreate more of them... I think I need the extra hour of daylight savings time every DAY!

It was fun to see my second project as one of today's posts.
Your punches will be put to good use with this project-- I used thirteen of them as I was designing it!  The set of six cards and matching envelopes store inside the birdhouse box.  (I was inspired by an actual birdhouse.)  The roof is hinged so it lifts to put the cards inside.  

The complete tutorial is available HERE.

Monday, November 7, 2011

Petite Pocket Nativity

The Knock Out Punches UStamp session is amazing!!   Super projects with some incredibly creative uses of Stampin' Up punches.    The first of my three projects was posted today-- a punch art nativity and card set.
This was SO much fun to design.  I love how the light glows through the vellum backing on Baby Jesus.

Making this was not without mishap, however, as one of our critters ate the first sheep!  I never did figure out who was the culprit.  There were several who could have been blamed.  This photograph has sheep #2 in it.   Luckily they are quick to make!

The complete tutorial is available HERE along with many, many more!!

Tuesday, November 1, 2011

Monochromatic Swap

Just purple and white on this set that I made for a Friend to Friend swap.  
The petal cone ribbon dispenser has three different types of ribbon: 1/2" Concord Crush Poly-Stitched, 3/8" Wisteria Wonder Ruffled and 1/4" Whisper White Grosgrain.  I have a tutorial for how to make the ribbon dispenser HERE if you are interested.
The focal piece of the card is Whisper White with an image from the Delicate Doily set stamped with VersaMark ink and heat embossed with Iridescent Ice embossing powder.  It is sponged with Crushed Concord and Wisteria Wonder ink.

Tuesday, October 25, 2011

Blossom Box Accordion Flower Tutorial

Another discovery of a great way to use the Blossom Box Die!  And it is easy as can be! Just adhere three pleated box sections and you have a beautiful accordion flower.   This is 8 inches in diameter so it is a great size for decorating.   Lots of possibilities with this one!
Instructions:
1. Die cut three pieces with the Blossom Box Die from Designer Series Paper.
2.  Mountain fold on the solid lines (very easy as they are pre-scored.)  And valley fold on the dotted lines (again very easy because you can line up the notches.)
3.  Clip the bottom flap in the center up to the score line.  (Ignore the cut piece in the above picture)
4.  Example of the mountain folds on the score lines.
5.  Examples of the valley folds matching the notches.

6.  Adhere three sections together on the outside flaps.
7.  I punched a hole in a small styrofoam plate, threaded a ribbon through and applied sticky strip to the back.

Friday, October 21, 2011

Blossom Box Bowls Tutorials

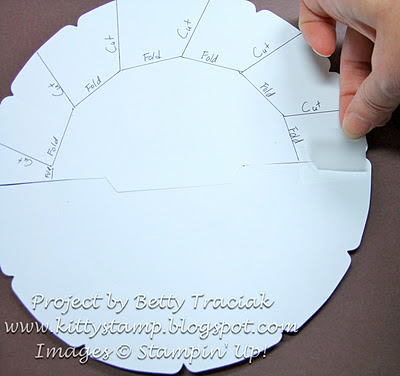
The Blossom Box Die can be used to make bowls!  When the paper is run through Big Shot machine, this die not only cuts the shape it scores the paper so it can be folded into a box.  Well,  if you cut on some of those score lines and then reassemble it you can make these two bowls.  Pretty nifty!!

To make the Milk Duds Bowl:
1. Die cut two pieces of Designer Series Paper with the Blossom Box Die.   Cut away the two bottom flaps.  Cut on the lines as shown.  (Just follow the pre-scored lines on the die cut.)  Fold on the lines shown.  (Again these are pre-scored.)
 2. Adhere the two die cut sections together.
 3.  Locate the score lines indicated by the dashed lines.
 4.  Apply adhesive to the back right hand edge of each petal.  Overlap up to the score line and adhere firmly.
 5.  Continue around the bowl, overlapping each petal.
6.  Fill with yummy treats!

To make the M&M bowl:
1.  Die cut two pieces of Designer Series Paper with the Blossom Box Die.   Cut away the two bottom flaps.  Cut on the lines as shown.   (The lines are pre-scored.)
 2.  Adhere the two die cut sections together.  Place Scotch tape on each side where the sections meet.
 3. Fold on the lines marked "Fold".
 4. Apply adhesive to the back right hand edge of the flap marked "A".
 5. Overlap so that point "A" meets point "B".  Continue around the circle to form the bowl.
6.  Outside view of the overlap.
7.  Keep filling and refilling the bowl... the M&Ms seem to disappear magically!!