Friday, April 29, 2011

Colored Embossing Powder Techniques


Welcome to the Stampin' Addicts Summer Mini Blog Hop.  There are more than 20 stops in the hop each featuring a different product from the Summer Mini Catalog.  You may have arrived here from Barbara's blog where she showcased the beautiful bright Beyond the Garden Designer Series Paper.  If you get lost at any point you can see the all the hop stops by clicking HERE.

I have been having a great time experimenting with the new colored embossing powders.  They are available in the bold bright colors of Wild Wasabi, Melon Mambo and Tangerine Tango which are perfect for summer projects.  From embossing ribbons and buttons to stamping on glass, metal and dark cardstock these powders can be used in many creative ways.
I thought the melon and tangerine would make a lovely sunset so for this first card I masked a circle for the sun and covered the remainder of the paper with versamark ink.  Starting at the bottom I added the tangerine powder and blended it with melon as I went up the card.  After heat embossing, I sponged the sun with Daffodil Delight ink and stamped the sailboat with Staz-on Jet Black.  The sails are paper pieced with Whisper White cardstock.

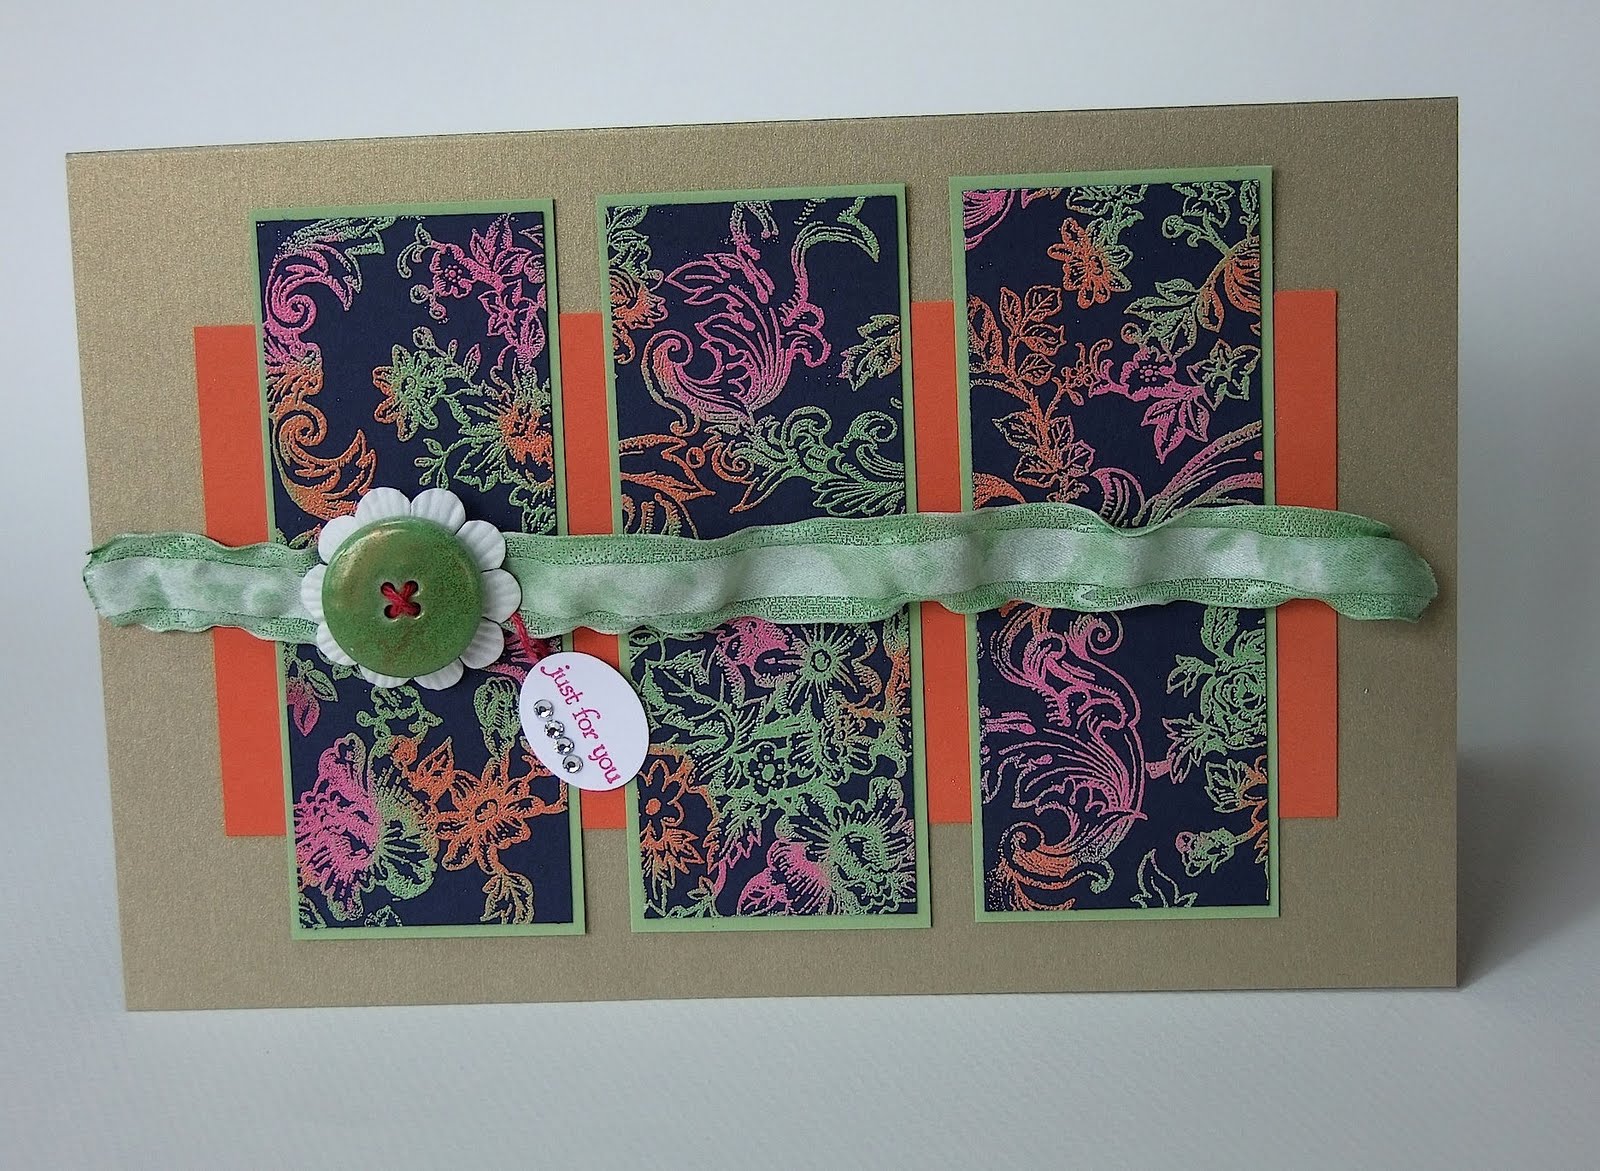
One of the great things about colored embossing powder is that it stands out on dark colors.   For the background sections of the card, I used the Bella Toile stamp on a piece of Night of Navy cardstock.  Starting with one color I poured embossing powder on in little blobs, shook it off, and applied another color.

The button and ribbon are also embossed.  The button was first covered with gold embossing powder, heated and while it was hot sprinkled with a fine dusting of Wild Wasabi and embossed again.  The ribbon is white organza that I ran over the versamark pad and coated with wasabi powder.  When it was heated, it melted and curled slightly giving a very cool effect.

I chose brushed gold for the card base to complement the shininess of the embossing and the little touch of pink thread is the new white baker's twine colored with the Melon Mambo marker.

This next card has a couple of unique techniques.  I embossed a piece of copper with the square lattice die and used the wasabi powder to emboss the raised design.

The flower is cut with the table setting die and the edges are embossed with Melon Mambo and gold.  To do this I ran the versamarker along the edges of the flower reaching in about half way.  I embossed this with Melon Mambo.  Then I ran the marker along the edges again but only at the upper edge and embossed this with gold.  After is was cool I used reinkers in Tangerine and Daffodil to add color to the inside of the flower.

The Belle Toile background is done the same as the dark background of the second card but has a very different look when embossed on watercolor paper.

My last project has a few more ideas for the powders.  The surf boards and pail are embossed on shimmery white cardstock giving the look of fiberglass.  These pieces have spacers behind them so they sit away from the back of the frame allowing the seashells go in back and in front of them.  This shadow box has an inch of space between the glass and the background so it was perfect to add the standup elements and the seashells.

The fish and bubbles are stamped on the glass giving a 3D effect and the turtle is a stamped impression.  To make the turtle I covered a circle of cardstock with multiple layers of embossing powder heating in between each and quickly placed the stamp (covered with versamark) into the hot melted powder.

I will have all the measurements for these projects, close up photos and tips for making these starting Monday after the hop.

Thank you for stopping by and I hope you have been inspired to use these pretty new powders in different ways.  Now it is time to hop on over to Cindy's blog and see what amazing things she has done with the Flower Garden embossing folder.
Previous Blog                                         Next Blog

Thursday, April 21, 2011

Petal Cone Easter Table Favor

Here is a fun idea for an Easter table favor and place card.
Once again I used my trusty petal cone die.  What would I do without it??
A large Cadbury creme egg sits on top of flowers cut with the Fun Flowers die.

To make this:
1. Cut two petal cone pieces from Daffodil Delight.
2. Fold in half, place the score line at the 3 1/2" mark on the cutter and cut the tip off.

4.  Assemble the petal cone with sticky strip.
5.  Secure a length of ribbon inside the opening letting it drape over the edge.
6.  Attach a butterfly cut with the Beautiful Wings embosslit using a mini glue dot.
7. Cut two flowers with the Fun Flowers die.  Clip in between each petal of the larger flower. Curl the petals over a pencil.
8.  Adhere the egg to the flowers with a large glue dot.

Wednesday, April 20, 2011

Golden Bunny Baskets

More bunnies today!  Orange, brown and green may not be traditional Easter colors but I thought they were pretty with the gold of the chocolate bunnies.
I used the new Beyond the Garden DSP for the flowers and the leaves.
These three little baskets were super quick to make.  There have been similar ones done before but I thought I would do a little tutorial with the measurements so you could easily reproduce these if you would like.

The colors I used for the baskets are Early Espresso, Poppy Parade, and Garden Green.  The Beyond the Garden DSP looks very nice with these shades.

1. For each basket cut one top note shape, two 1"X 2-1/2", and one 3/4" X 11" pieces of cardstock.
2. Emboss the top note and the side pieces with the square lattice folder.
3. Make two score lines 3/4" from the center of the top note.
4. Score 1/2" from each end of the side pieces.
5.  Using sticky strip add the side pieces and the handle.
6. Punch three flowers with the Boho Blossom punch.  Scrunch the flowers up. Layer all three, pierce and add a brad to the center.
7.  Leaves are punched with the 2-step Bird punch.

Tuesday, April 19, 2011

Vintage Easter Basket

This is a quick little Easter basket I made to send to my Grandma.  Amazingly this is the first time I have used the milk carton die.  Thanks to Tracey Old who shared this project on UStamp for the idea!
I liked the soft colors of the candy wrappers and used that as the basis of the color scheme.  The seam binding bow is made by folding the ribbon back and forth on itself, then tying it in the middle with another length of ribbon.  My mom taught me to make bows like this when we were wrapping Christmas presents together years ago.
The candies look so pretty inside!

Sunday, April 17, 2011

Golden Bunny and Eggs Set

Purple and gold are beautiful rich colors for Easter.
This set has plenty of both plus lots of yummy chocolate.
The bunny sits in a petal cone basket.  I have a tutorial HERE for how I made that.  For this one, I omitted the punching on the inside section giving a solid base for the bunny to sit on.
The box holds a dozen mini Cadbury eggs. I used a tutorial from UStamp to make this.
I decorated the top with Concord Crush patterned paper from the Hostess DSP pack and a strip of brushed gold cardstock.
The stamps are from the Easter Blossoms set.  The main image on the card is stamped with Staz-On black ink and then watercolored with the Concord Crush re-inker.  This re-inker is interesting in that the color is not pure.  The color varies depending on how dilute it is.  Just by varying how much water I used I was able to get a gradient of purples and pinks for the flowers.  Of course this needed a touch of gold too so I mounted it on a mat of brushed gold.

Friday, April 8, 2011

New Triple Layer Doily Punch

From the moment I saw the new Triple Layer Punches I had an idea for folding the Doily Punch to make it 3D.
It worked perfectly!  The little tiny punched areas make it so easy to fold exactly.
I folded it in half.  Then opened it up and folded it in half the other way.
Next I flipped it over and folded it in half along the diagonal tiny punches.  It now has alternating valley and mountain folds.
The next photo shows it pinched together.
And finally this one shows it adhered into the final shape.
Here are close ups of the flowers and butterfly on the card.  The DSP is the new Beyond the Garden that will available in the Summer Mini.

Thursday, April 7, 2011

3D Circle Ornament Die Desk Set

My Big Shot has been busy again!  I made this desk set for my second design project for UStamp.
Many of the projects on UStamp Big Shot Brilliance use the dies in non-traditional ways.  The tutorial for this project and over 40 more are available HERE.