Thursday, February 25, 2021

Darling Birthday Donkeys


A quick post today of three birthday cards using the super cute and silly Darling Donkeys and Approaching Perfection sets.

A clean and simple design to show off this little darling.


The inside of the card is as cute as the outside.


These guys look like they enjoy a good joke.


The subtle color gradient and sparkle of the Rainbow Glimmer Paper make the balloons very special.
 
 
Stamps:  Darling Donkeys, Approaching Perfection (both are Sale-a-bration sets)
Paper:  Real Red, Bermuda Bay and Basic White Cardstock. Basic White Thick Cardstock, Snail Mail Designer Series Paper, Rainbow Glimmer Paper
Ink:  Tuxedo Black Momento,  Real Red Classic
Stampin' Blends:  Gray Granite, Crumb Cake, Petal Pink, Burmuda Bay
Accessories:  Flowers for Every Season Ribbon Combo Pack, Mini Glue Dots,  Sequins for Everything (carryover product)
Punches:  Balloon Bouquet
Big Shot:  Layering Squares, Stitched with Whimsy, Layering Ovals, Floral Gallery and  Happy Dies                                        

Sunday, February 21, 2021

Stamp Review Crew: 2021 Sale-a-bration Bonus Hop #2


The Stamp Review Crew has a second bonus hop featuring Sale-a-bration goodies.  In case you missed the first one you can check it out HERE.    The format is a little different for our Sale-a-bration hops. Instead of each member creating with the same stamp set as we usually do we are all using different Sale-a-bration products.   As always though we are archiving the hop for future reference.  Please click on the banner below to see past hops and to check out the bios of the crew members. 


My projects focus on the Punch Party host stamp set.  This one stamp set has sentiments and images for a whole "host" of occasions ;)  I used just a few for these little candy boxes.   Each box holds three Hershey's kisses.  The small flower and heart stamps are just the right size to decorate the upside-down chocolates.


The Oh So Ombre paper is also a Sale-a-bration item.  I really love the color gradient! 

The Oh So Ombre DSP is 6" X 6" so I tweaked the measurements of a box that I had previously designed to fit with this size paper.  For all the measurements and a video tutorial for making the box scroll to the bottom of the post.


The fun purple fluff is made by unraveling some of the Gorgeous Grape Sheer Ribbon. 

Another version using the Love You Always Specialty Paper.  Very elegant!  This one has no insert and holds three chocolate hearts.

 I trimmed the thin binding edge from some Blushing Bride Metallic Ribbon with scissors and used that to tie the tag.  I then unraveled the ribbon to make the fringe on the foil belly-band.


We have a lot of Crew members participating in this special bonus hop so be sure to click on the links below to see them all!


This way to Lou's lovely project!


This way to Jay's super blog!
 
Stamps:   Punch Party
PaperThick Basic White Cardstock, Oh So Ombre Designer Series Paper, Love You Always Specialty Paper, Love You Always Foil Sheets
Ink:  Gorgeous Grape, Granny Apple Green, Bermuda Bay Classic Ink
Accessories:   Blushing Bride Metallic Ribbon, Gorgeous Grape Sheer Ribbon, Mini Glue Dots, tombo Glue, White Embossing Powder, Resin Hearts
Punches:  Timeless Label, 3/4 Circle
Big Shot:  Message Dies,  Hydrangea Dies
 
 
Box Directions:  
 
PLEASE NOTE:   To make the box fit correctly note that the box BOTTOM is made from CARDSTOCK.  The box TOP and box INSERTS are made from Designer Series Paper.   If you use a different weight paper the lid and insert will not fit properly.
 
I have a past tutorial for the boxes.  The pink box above is made according to those measurements.   The 6" x 6" Oh So Ombre boxes have the following adjustments.  The insert is a new addition and is not part of the original tutorial.

Box Bottom:     5-1/4" X 7-7/8" CARDSTOCK
                            Score at 1" and 2" on all sides
 
Box Top:          3-3/8" X 6"  DESIGNER SERIES PAPER
                           Score at 1/2" and 1" on all sides
 
Box Insert:       2-1/4" X 4-3/4" DESIGNER SERIES PAPER
                            Score at 1/2" on all sides
                            Punch three holes with 3/4" Circle Punch before cutting tabs and assembling.
 
Original tutorial:


Sunday, February 14, 2021

Stamp Review Crew: Kangaroo and Company Edition


To learn more about the "Crew" click on the banner!


Things are hopping with the Stamp Review Crew today as we are using the adorable  Kangaroo and Company stamp set!


To go along with fun feel of this set I decided to make a long narrow pullout card that fits in a standard business envelope.   The colorful sleeve is made from the Field and Flower Designer Series Paper.  It is cut 7" X 7-1/2" and scored in half at 3-3/4.  TIP: Use a thin line of Tombo Glue on two edges to form the pocket.  Make sure the glue is close to the edge and use the glue very sparingly.

There are oodles of little images and phrases in this set and I thought it would be cute to stack some of them so they are revealed one by one as the card is pulled out.


The Stamparatus was super helpful in getting the alignment right.


This one is a birthday card...
...made with love!

The white insert is made with a partial diecut at the top.   Then the upper body of the kangaroo is glued on so that the bottom remains free to slip over the top of the sleeve.  (Scroll down to the bottom of the post for a visual of how this is done.)


And I made a change to the kangaroo's expression.  The stamped kanga has her eyes closed.  I used a Basic Black Stampin' Write Marker to draw in upper eyelids and eyelashes.  Isn't she a blue-eyed cutie?

Thanks so much for hopping by!  Your next stop is the very talented Cindy Elam!


This way to Cindy's Blog!


This way to Charlet's Blog!


Stamps:   Kangoroo and Company
PaperBasic White Cardstock, Flower and Field Designer Series Paper
Ink:  Tuxedo Black Momento Ink,  Basic Black Stampin' Write Marker
Accessories:   Blushing Bride Metallic Ribbon, Mini Glue Dots, tombo Glue
Stampin' Blends: Cherry Cobbler, Just Jade, Petal Pink, Soft Suede
Punches:  1/4 Circle (retired)
Big Shot:  KangarooDies,   
 

To make a partial die cut, place the top cutting plate at the place you wish the cut to end.  Run it through the die cut machine.

Cut up to the diecut either with scissors or by placing it in the Paper trimmer.   Glue the top portion of the stamped, colored and die cut image to the top portion of the insert leaving the bottom free so it slips over the outside of the pocket.


Monday, February 8, 2021

Just Want to Say Happy Valentine's Day

Just want to say... these were fun to make!  I have three Valentine cards that have three different pop-up styles.  They all use the words from the Floral Gallery dies, Flower and Field Designer Series Paper and the Heartfelt stamp set.

The first two cards have the words inlaid.  Die cut the words from Very Vanilla and the DSP.   Then inlay the words from one into the outline of the other.  TIP:  Don't forget to add Adhesive Sheets to the back before die-cutting.  It would be a real challenge to put glue on each of the little pieces.  With the adhesive sheets it is like fitting the pieces of a puzzle neatly in the proper place!


The pop up for this one is cut into the DSP.  For a quick visual scroll to the bottom of the page for how to do this.


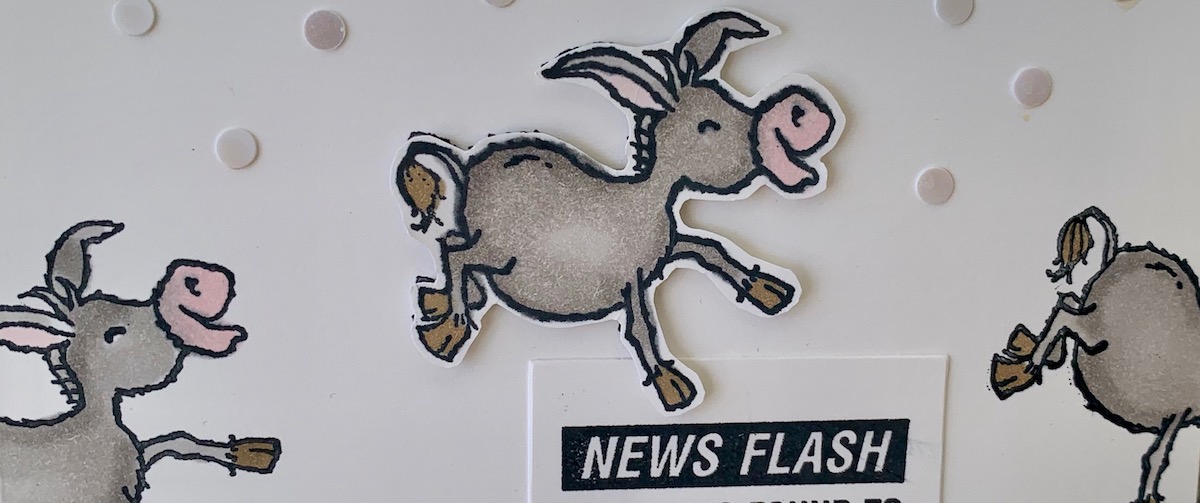
I inked the stamp with Flirty Flamingo ink and then outlined the stamp with Real Red marker and blended it with a sponge dauber.


This one is also an inlay using the left over pieces from the first card.  I tucked the pretty Blushing Bride Metallic Ribbon underneath so just a little edge peeks over the top and bottom

The pop up is a 1" X 11" piece of cardstock scored 2-3/4" from each end and also at 5-1/2"  The plain heart at the bottom is a cute place to sign the card.


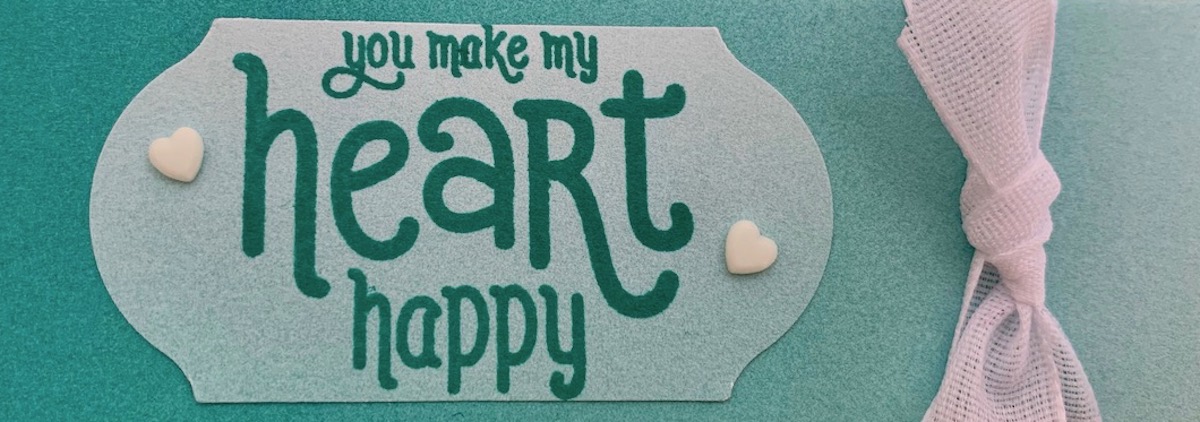
The third card is a skinny card to go in a 3-5/8" x 6-1/2" envelope.  I liked the way the words fit in the space.  Again I put adhesive sheet on the back before cutting the words and it made it very easy to place and stick the words just where I wanted them.  The frame is stamped with a texture stamp from the Woven Heirlooms set with Cherry Cobbler ink on Cherry Cobbler paper.


This one has a simple box made with a strip of paper 1-1/2" wide for the pop up.


I added a piece of DSP to both sections of the card before adhering the pop up box.


Stamps:   Heartfelt
PaperVery Vanilla and Flirty Flamingo, Cherry Cobbler Cardstock, Flower and Field Designer Series Paper
Ink:  Flirty Flamingo, Real Red and Cherry Cobbler Classic Ink, Real Red Stampin' Write Marker
Accessories:   Blushing Bride Metallic Ribbon, Adhesive Sheets
Punches: Heart Combo Pack
Big Shot:   Floral Gallery Dies,  Stitched Rectangle Dies    
 
 
To make the pop up for the first card:
 
Insert a folded piece of paper into the trimmer with the fold at the top.  Place the edge of the paper at the 1" mark.   Cut down 1-1/2".  (For a smaller pop-up cut down one inch.)  Flip the paper keeping the fold at the top and repeat the cut on that side.


Turn the paper 1/4 turn.  Using the SCORING blade score from one end of the cut to the other cut.  Flip the paper and do this on the other side.