
My Digital Studio by Stampin' Up is so easy and fun to use. This week I am going to highlight some basic tips and tricks for adding interest to your pages.
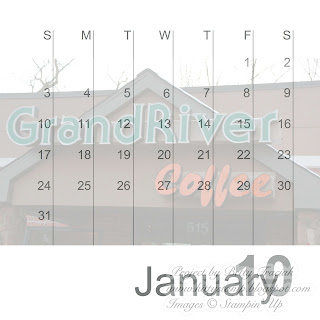
I made a calendar for my parents for Christmas using pictures of my brothers and our family. January has my brother and SIL. They own a great coffee shop. (If you are near East Lansing, Michigan be sure to stop by Grand River Coffee Cafe. I am not a coffee drinker but my husband loves their Mexican roast and our daughter goes nuts over the cappuccino. Now tea is my thing and I love the teas they make using blends from a company in Traverse City.)

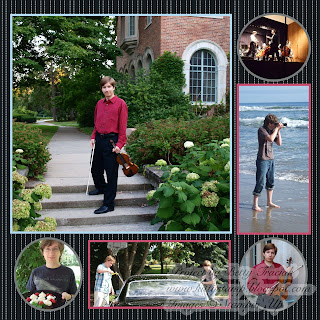
I did a month for each grandchild and February has our middle son Aaron. He is a senior this year and is our family artist. He plays the violin, piano and loves photography.

First, I want to point out how I made the bottom half of the pages. With the calendar grid page open, click on photo layouts in the left hand column. Scroll all the way to bottom and double click on the very last layout (the 12 x 12 picture).

The screen will now look like this. The calendar grid will be completely covered by the photo box.

Next, add the photo of your choice. Then on the right hand side, move the opacity slider to 30%. As you lighten the opacity, the calendar grid will reappear.

For the calendar portion of February, rather than add a photo I added designer paper as a background layer and reduced the opacity to 75%. (If you decrease the opacity of red too much it becomes pink.)
Adding color and photos to the bottom half of a calendar is a great way to pull the top and bottom together making it look like a larger cohesive layout.
No comments:
Post a Comment