Sunday, January 31, 2010

Welcome Neighbor Frame

Another quick little project using the Welcome Neighbor Designer paper.

The papers in this pack are so fun to experiment with. I combined three different papers to make this 3D scene. The house and clouds were cut from one paper and popped up on dimensionals on the tree background. I cut the little row of houses from a third paper pattern. I inked up just the "welcome" portion of a bigger stamp with a marker and stamped it on the sky colored background paper and punched it with the word window punch. I added a ribbon before putting it in the frame. Super easy and very cute!

Saturday, January 30, 2010

Mini Matchbox Basket

This is a super quick little valentine basket made with the Matchbox die.

I wanted to use the Welcome Neighbor paper for this project. It comes in 6 X 6 sheets. I first cut a strip 3/4" X 6" from one side for the handle. The box portion of the die is slightly longer than 6 inches but I was able to cut this out with just a smidge missing from both ends and the box still went together just fine.

With four Hershey nuggets wrapped and tucked inside this is a yummy little valentine.

Supplies: Welcome Neighbor dsp, Matchbox die, Full Heart punch, Heart to Heart punch.

Tuesday, January 26, 2010

Welcome Neighbor Swap Card

As I was making this card for a UStamp swap I realized this would be a great card for a class project. So I am writing this up in a little more detail in case anyone would like to use it. Because of the pattern of the paper it is efficient to make either 6, 12, or 18 of these cards.


For 12 cards you will need:

Paper:
6 sheets Melon Mambo (8-1/2 X 11), plus scraps for punching
1-1/2 sheets Crushed Curry
1 sheet Old Olive
Whisper White for punching
2 - 6 x 6 sheets Welcome Neighbor dsp ( blue with olive houses)
2 sheets Welcome Neighbor dsp (multi-colored rows of houses)

Stamps:
Teeny Tiny Wishes

Ink:
Old Olive

Ribbon:
12 pieces Melon Mambo dotted grosgrain - 4-1/2"

Punches:
Scallop Trim edge
Scallop Trim corner
Heart to Heart
Word Window


Directions:
1. Cut the blue paper into 2 X 3 inch squares.
2. Cut the multi-colored house dsp into strips. Hand cut the tops of the houses in a zig zag pattern. Trim to 4-1/4".


Tip: It is easiest to cut into the valleys from the top down as shown.


3. Stamp greeting in Old Olive on Whisper White. Punch with Word Window. Punch hearts with Heart to Heart punch from Melon Mambo.

4. Cut 1 inch strips of Old Olive. Punch with scallop edge punch. Trim to 3-1/4". Cut 2-1/4" X 3-1/4" rectangles of Crushed Curry.

5. Cut, fold and score Melon Mambo card base. Punch upper right corner with corner punch.
6. Assemble card as shown.


Sunday, January 24, 2010

Crackled Frame Art


My latest craft store find was a dollar unfinished wooden heart frame. I knew I wanted to use the Sweet Pea Stitched Felt pieces for this project so I chose colors to coordinate.

First I painted the frame with a wine colored acrylic paint. Then coated the top with white crackle paint. I purposely put it on light in some areas and heavy in others. In thin areas the paint dries in fine crackles; in thicker areas the crackles are larger. I used my heat gun to speed up the process.

Once the paint was dry I sponged three colors of ink on the crackled surface starting with the lightest color first - Pretty in Pink, Rose Red and Chocolate Chip.

I traced the heart opening on Designer Series Paper from the Sweet Pea stack, cut it out and in inserted it in the frame.

The letters were inked with Pretty in Pink and then lightly sponged with Chocolate Chip to give them a slightly distressed look.

The bird and butterflies were punched from Sweet Pea paper and the felt pieces were the final accent.

Supplies: Paper - Whisper White, Sweet Pea Designer Series Pack. Ink - Pretty in Pink, Rose Red, Chocolate Chip. Stamps - Lovely Letters. Accessories - Sweet Pea Stitched Felt, 2-Step Bird punch, 1" square punch, Beautiful Butterflies embosslet.

Tuesday, January 19, 2010

My Digital Studio experimental box


I have been wanting to experiment with MDS to see if I could use it to make hybrid boxes. This first attempt, while rather simple, shows that it certainly does work.


Here is the screen shot of what my canvas looked like prior to printing. I used the rectangle punch to create the layer that would be the base and sides of the box. The rulers at the sides were used to determine how big each section would be. I continued to stretch the punch until it was large enough for the sides of the box and bottom plus flaps for putting the box together. I then added the large oval punch and stretched it to fit the front and back of the box. (I used copy and paste to get the front and back ovals the exact same size and used the align function to make sure the front and back of the box would match.) All areas were filled with the same color cardstock.


I added other punches filled with designer paper from the My Sweet Pea Designer Kit and "stamped" the Happy Birthday and scallops on the sides.


It was then printed on Whisper White cardstock on my home printer, cut out, scored and assembled. I added the ribbon handle and tag made from the coordinating Sweet Pea designer series paper stack to complete the box.


I plan to continue to experiment to see what other box designs I can make MDS. I think this has possibilities!

Supplies: My Digital Studio, Whisper White cardstock, Sweet Pea Designer Series Paper Stack, Teeny Tiny Wishes stamp set, Word Window punch, hemp twine, Ribbon Originals Alpine (retired).

A Series of Unfortunate Events

Some days when I stamp everything seems to fall in place. The colors look great, the stamping is clean, the cuts are straight. Other days nothing works. When making the card from the last post I smudged the sentiment when I stamped it. I flipped the card over figuring I could cover the inside with another piece of paper. But... I got it crooked this time. As I was really trying to do a one layer card for that design, I set the messed up card aside, got out my Stamp-a-ma-jig (which I should have done in the first place) and stamped another card.


The next day the messed up first card was still on my stamping table. I hate to waste anything so I thought I would see what I could do with it. I had planned to make a window card using the little squirrel from Love Bandit so I set to work to see if I could salvage this card base.

The Full Heart punch just fit over the smudged sentiment so I punched that out. So far so good - I could add a pretty paper behind and cover the second crooked stamping attempt.


I added the patterned paper. Stamped and cut out the squirrel. Used the stamp-a-ma-jig and got the sentiment perfectly to the right of the heart cut out and.... touched the bottom of the heart with inky fingers and made a mess. I tried rubbing it out, blotting with a wet sponge - nothing worked. (I was in no mood to take another picture or I would show you the disaster.)

So I found another piece of patterned paper, positioned it where I wanted it, traced the heart to get the placement right and punched it out. Thankfully, by this time I was beginning to like the changes. I added little dots to each scallop, moved the sentiment to another position, added the ribbon and heart and was actually happy with this in the end! All this to save a piece of cardstock - sometimes mistakes do work out well.


Here is the inside view of the card.


When I do not have ribbon to match a project, I often use this trick. Run the thin end of a coordinating color of marker along the edge of white grosgrain ribbon. Instant striped ribbon.


Monday, January 18, 2010

Valentine Owls

I find simple cards the hardest to design. Usually I have multiple layers and/or textures, but these little owls seemed to stand on their own. Bright cheery colors on a cold winter day.

Stampin Up supplies: Old Olive, Real Red and Whisper White cardstock, Real Red, Tempting Turquoise and Pumpkin Pie classic ink, 3/4 circle punch, Heart to Heart punch, corner rounder punch, Whisper White grosgrain ribbon, Stampin' Dimensionals

Saturday, January 16, 2010

UStamp With Love ... 2010 project


The fun had begun at UStamp and my project was one of two posted the very first day. There is a whole month left to enjoy all the daily projects, chats, prizes and fun. You can join here.

Here is a peek at my project:


It is a 3D frame using what other than my current favorite set - Love Bandit! A complete tutorial with all measurements and instructions is available on UStamp!


Friday, January 15, 2010

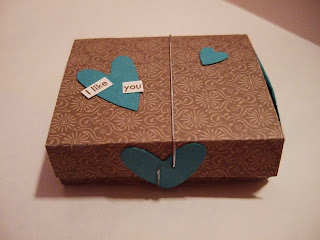
I Like You candy box


Today's project is a candy box made from the matchbox die. Four Hershey's Nuggets wrapped in dsp fit inside. Instead of making the lid into a slider as in the post two days ago, I wanted this one to open on the side.


I needed a way to keep it closed so I poked two holes through a punched heart and the edge of the lid. Next, I threaded elastic cord through both pieces and knotted the ends.


Slipping the thread loop around the box holds it closed.


The sentiment is from the Love Bandit stamp set. This plus the mini frame and card from the last post make a cute coordinated valentine gift set.


Thursday, January 14, 2010

Blog Candy Winner


And the winner is Sue!! Sometimes it is good to be first - here is the screen shot of the random generator I used to pick the winner. Sue - please email me at bettyt@cablespeed.com so we can get you all signed up for tomorrow's opening day.


Another fun Love Bandit project is in the works for tomorrow right here on Kittystamp. See you then!


Wednesday, January 13, 2010

Whoo Hoo!! More Blog Candy!


Only two more days until UStamp With Love .... 2010 starts! And the cool thing is you can win a free pass!

You only need to leave a comment on this post telling me what is your favorite post from my new blog. I have only been doing this 3 weeks so there are not that many posts yet:) You have until 3PM tomorrow (Thursday Jan 14) to leave a comment. At that time I use random.org to select a winner. Make sure I have a way to contact you as I need to have the winners email address to be able to have the invitation to the UStamp session sent to you on the 15th. If you have already signed up for UStamp With Love your money will be refunded.

There are so many cool projects in this session - I need more hours in my day as I want to make them all!


You can click on the blinkie above to learn more about it.

Top Note Valentine

Top Note owls have been very popular. As I had never made one, I decided to make one with a Valentine theme to go with the little owl image from Love Bandit. Using a lot of punches made this a fun project to put together.


The sentiment is done with My Digital Studio. I love being able to quickly type anything in matching SU colors and print it on my home printer. My cheap little HP printer does a great job with the colors. It will only handle light-weight cardstock such as SU Whisper White but that is fine for things like this.

The little owls are on the inside of the card.

Stamping Up materials: Paper - Rose Red, Kraft, Whisper White, Throughly Modern dsp. Ink - Rose Red, Sahara Sand, Bermuda Bay, Soft Suede. Punches - 1-1/4", 1" and 3/4" circle, Full Heart, Scalloped Oval, Wide Oval, Word Window, 5-Petal Flower. Accessories - Top Note die, My Digital Studio

Monday, January 11, 2010

Love Bandit Mini Frame


This week I am focusing on an adorable new stamp set - Love Bandit. The raccoon is just the cutest! The images fit perfectly inside the box made with the Big Shot Matchbox die. I wanted this to stand up as a mini picture frame so I added a 1-1/2 x 2-1/2 inch piece of cardstock scored at 1/2 inch . The 1/2 inch section is adhered to the back of the matchbox.


The "grass" is a striped strip of designer paper snipped at small intervals. (Really sharp scissors are necessary here) The flower is mounted on a piece of coiled wire and the tree popped up on several stacked dimensionals.


It slips inside the matchbox lid to make a perfect 3D valentine.

Stampin Up Materials: Throughly Modern dsp, Soft Suede and Bermuda Bay cardstock, Chocolate Chip ink, Real Red Stampin'marker, Trio Flower punch, Word window punch, Heart to Heart punch

Friday, January 8, 2010

My Digital Studio - a few more basics


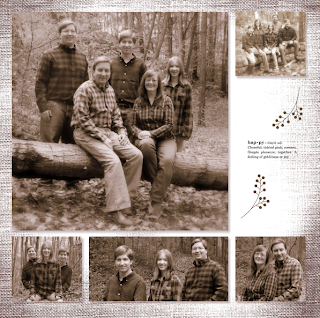
This page has our oldest son, an avid hunter and outdoorsman. I love the effect of using a photo as the background paper for a layout. It was one of those "ah-ha" type moments when I discovered this was an option. With traditional scrapbooks this would not be possible.


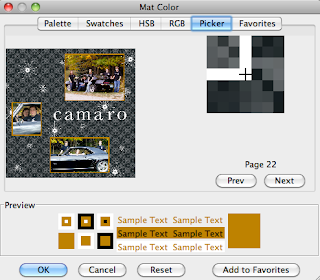
For this page I used the Color Picker to choose the color for the mats on the layout. By moving around on the photograph I was able to see the colors as separate pixels and choose a tone from the leaves to mat the pictures.


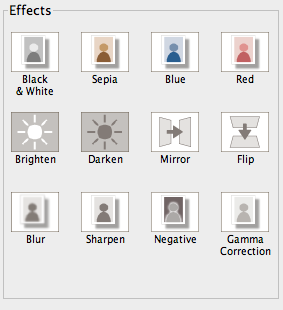
This program even has built-in phot0 effects. I used it to lighten the bottom left photo in this layout that was too dark. (It has not been lightened in this photo but it is lighter on my final draft) This is much faster than having to use a separate photo editing program.


I hope this weeks tips and tutorials have been helpful in highlighting some of the fun things this program is capable of. I have barely scratched the surface, there is so much more. I plan to add more advanced info as time goes on so I hope you are able to check back.