

I have been having a great time experimenting with the new colored embossing powders. They are available in the bold bright colors of Wild Wasabi, Melon Mambo and Tangerine Tango which are perfect for summer projects. From embossing ribbons and buttons to stamping on glass, metal and dark cardstock these powders can be used in many creative ways.

I thought the melon and tangerine would make a lovely sunset so for this first card I masked a circle for the sun and covered the remainder of the paper with versamark ink. Starting at the bottom I added the tangerine powder and blended it with melon as I went up the card. After heat embossing, I sponged the sun with Daffodil Delight ink and stamped the sailboat with Staz-on Jet Black. The sails are paper pieced with Whisper White cardstock.
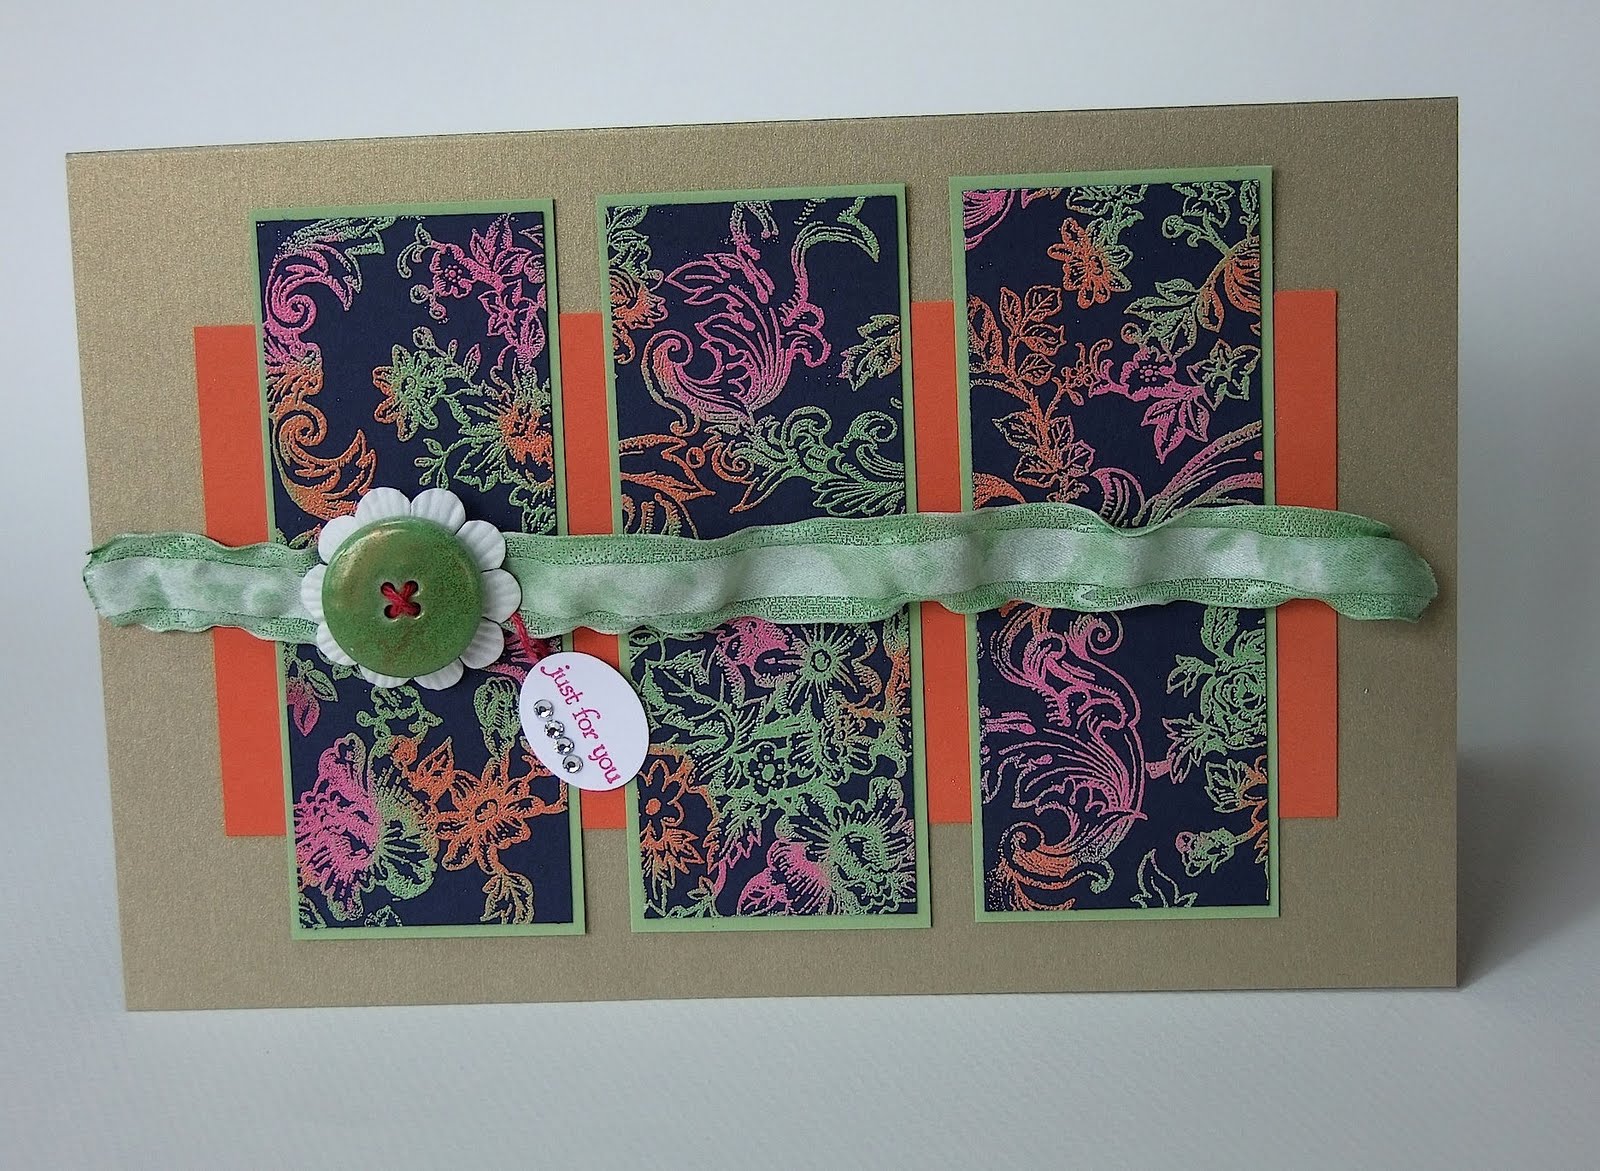
One of the great things about colored embossing powder is that it stands out on dark colors. For the background sections of the card, I used the Bella Toile stamp on a piece of Night of Navy cardstock. Starting with one color I poured embossing powder on in little blobs, shook it off, and applied another color.
The button and ribbon are also embossed. The button was first covered with gold embossing powder, heated and while it was hot sprinkled with a fine dusting of Wild Wasabi and embossed again. The ribbon is white organza that I ran over the versamark pad and coated with wasabi powder. When it was heated, it melted and curled slightly giving a very cool effect.
I chose brushed gold for the card base to complement the shininess of the embossing and the little touch of pink thread is the new white baker's twine colored with the Melon Mambo marker.

The flower is cut with the table setting die and the edges are embossed with Melon Mambo and gold. To do this I ran the versamarker along the edges of the flower reaching in about half way. I embossed this with Melon Mambo. Then I ran the marker along the edges again but only at the upper edge and embossed this with gold. After is was cool I used reinkers in Tangerine and Daffodil to add color to the inside of the flower.
The Belle Toile background is done the same as the dark background of the second card but has a very different look when embossed on watercolor paper.

The fish and bubbles are stamped on the glass giving a 3D effect and the turtle is a stamped impression. To make the turtle I covered a circle of cardstock with multiple layers of embossing powder heating in between each and quickly placed the stamp (covered with versamark) into the hot melted powder.
I will have all the measurements for these projects, close up photos and tips for making these starting Monday after the hop.
Thank you for stopping by and I hope you have been inspired to use these pretty new powders in different ways. Now it is time to hop on over to Cindy's blog and see what amazing things she has done with the Flower Garden embossing folder.
Love how you used the new embossing powders. Great projects.
ReplyDeleteOMG! These are fabulous. You were truly inspired to greatness here :)
ReplyDeleteWow! What amazing uses of the embossing powder! Each one is more fabulous than the last! I have to go try them ALL!
ReplyDeleteWhat a terrific variety of projects, Betty! The embossed 'verdigris' copper card is simply superb. . . .
ReplyDeleteGreat techniques and projects. Thanks for sharing all those ideas.
ReplyDeleteGreat projects and techniques!! I love all of them!
ReplyDeleteWow, love everything you did with those projects! Really love the copper with wasabi! I really wish we still had copper stuff, my fav metal. I can just imagine how much texture these cards have!
ReplyDeleteAll beautiful! I particularly love the card where you embossed the copper - what a neat effect that gives!!
ReplyDeleteGorgeous one and all! I love how you presented such unique ways to use embossing powder!
ReplyDeleteWowza! These are such impressive projects, and I am just amazed at what you've done! Thanks for all your hard work!
ReplyDeleteYou did an absolutely beautiful job on your projects!!!
ReplyDeleteWOW...Lots of ideas for embossing... I LOVE your frame...
ReplyDeleteFaith
Wow-great ideas!! Great variety and inspiration to get these fun new powders out and USE them!!
ReplyDeleteLove your lattice card! Love that copper and wasbi together! Terrific projects showcased today!
ReplyDeleteHoly smokin' heat tool -- you have raised the art of heat embossing to a whole new level in my eyes! Thanks for the tons of ideas you've shown here!
ReplyDeleteWow, I had no idea that embossing could look that gorgeous. The sky is AMAZING and the copper... WOW!
ReplyDeleteGorgeous projects, just gorgeous! Love the sailboat card! All of the projects are amazing.
ReplyDeleteWow! Some really cool techniques, Betty!
ReplyDeleteLove the embossing powders on the navy, what a great look!
ReplyDeleteI just love the projects... and the new embossing powders are definitely a must-get! Tks for sharing.
ReplyDeleteImpressive! I love all of them, but the beach stuff is my fave!
ReplyDeleteBlown away.
ReplyDeleteFontella
Wonderful projects! But the flower gold one .. stunning!!
ReplyDeleteOh how much fun these must have been! They are amazing! I love your techniques. That third card is just stunning. Love your flower.
ReplyDeleteGreat ideas, great projects! Love them! Thank you for sharing it all!
ReplyDeleteOh my Gosh! What fun techniques for the embossing powders! Especially loved the way you showed the contrast of Bella Toile on white and on black.
ReplyDeleteWOW is an understatement. Embossed copper? Do you have a PhD. in paper crafts? You are amazing.
ReplyDeleteBetty, I love how you showcased the embossing powders. Such beautfiul projects. How did you find the time to get this all done and help Dawn? I know, no date nights, right? lol :)
ReplyDeleteLove all of your projects using the embossing powders.
ReplyDeleteWow, some really neat ideas here!!!! And beautiful projects! I think I like the copper embossed sheet the best - just gorgeous!
ReplyDeleteCindy
Wow! I love each of your projects and all of the awesome embossing techniques that you used. Great work!
ReplyDeleteGorgeous creations! I'm pretty sure Jimmy Buffet is on that sailboat! My favorite is the shadowbox frame-fabulous!
ReplyDeleteawesome, awesome, awesome!!!! I love everything you did here...paper piecing that sailboat I bet was tedious, but it sure did pay off.
ReplyDeleteThe turtle on the frame...you could have stamped into the fun foam (kids crafts) instead of using so much of the EP. What you did was cool, But I am sharing a technique with you :)
heat the fun foam with your heat gun, it might just start to curl, that is the perfect time to stamp into it, either plain or with ink, or watermark ink, let it sit on it a few minutes then remove your stamp...TA DA! Home made charm :)
I tried following you but blogger is acting up.
Susan
AHA!! the follow up in the header is working :)
ReplyDeleteso... new follower here.
Susan