Finally, I am getting a chance to post the details of my remaining Peekaboo Frames projects from last weekend's Stampin' Addicts Blog Hop. This has been a whirlwind week with both boys heading back to college and Leah and I getting back to homeschool. All in all a very productive week just not in the craft room! Earlier in the week I posted the tutorial for the Pop-Up Beach Chair which you can see in this post.
Now for the other project specs:
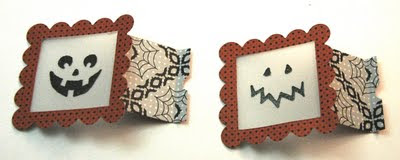
For this petite pumpkin luminary:1. Die cut two scallop square frames from DSP with the Peekaboo Frames die.
2. Bend the center flap to the side and score 1/4" from the edge.
3. Stamp the pumpkin face from the Jack of All Trades stamp set on vellum cardstock with versamark ink and heat emboss with black powder. Adhere behind opening.
4. Adhere the two pieces together.
For the mini art pieces:
Cut frames from DSP and bend the center flaps down to form a stand. These use the Charming stamp set.The image is stamped in Night of Navy on watercolor paper, punched and decorated with pearls.
For this one the background was done with wash of diluted Night of Navy and Bravo Burgundy reinkers on watercolor paper. Once dry the images where stamped with the inks in the same colors.
On the last one, the floral image is stamped tone-on-tone with Bravo Burgundy ink on the matching color cardstock. The ribbon is white taffeta dyed with re-inker which is then twisted and stuck to a large glue dot. The leaves and stem are coated with Dazzling Details glitter glue.
And for the Boo Day card:
Measurements:
Base is 4-1/4" X 11, scored at 5-1/2"
Old Olive layer is 3-3/4" X 5-1/4"
Whisper White layer is 3-5/8" X 5"
DSP is 5/8" X 3-5/8"
The font for the "happy boo day!" is called Cracked and size is 44. I printed this on Whisper White before cutting the layer to size.
The little ghost is from the Holiday Blitz digital stamp set. It is resized to a width of 1.319-- (Leave the Keep Proportions box checked so you will have the correct height.) This pixelated slightly but not enough to bother me. Punch the image and adhere to the back of a black circle peekaboo frame.
Well I hope you are inspired to try the Peekaboo Frames die!


TFS - I've only used that die one time and not all of it either!
ReplyDelete