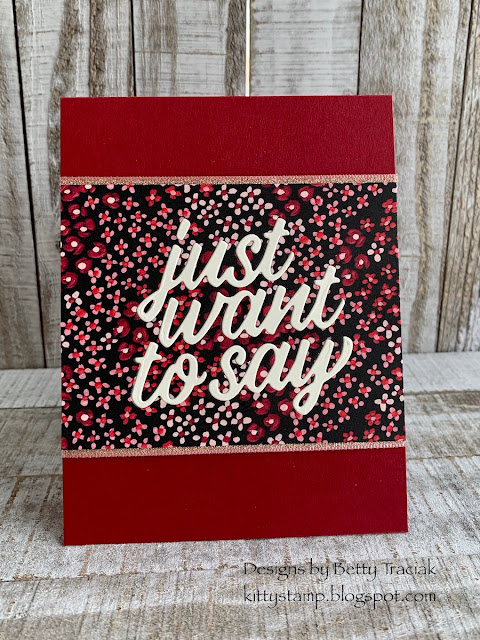
Just want to say... these were fun to make! I have three Valentine cards that have three different pop-up styles. They all use the words from the Floral Gallery dies, Flower and Field Designer Series Paper and the Heartfelt stamp set.
The first two cards have the words inlaid. Die cut the words from Very Vanilla and the DSP. Then inlay the words from one into the outline of the other. TIP: Don't forget to add Adhesive Sheets to the back before die-cutting. It would be a real challenge to put glue on each of the little pieces. With the adhesive sheets it is like fitting the pieces of a puzzle neatly in the proper place!
 |
The pop up for this one is cut into the DSP. For a quick visual scroll to the bottom of the page for how to do this.
I inked the stamp with Flirty Flamingo ink and then outlined the stamp with Real Red marker and blended it with a sponge dauber.
This one is also an inlay using the left over pieces from the first card. I tucked the pretty Blushing Bride Metallic Ribbon underneath so just a little edge peeks over the top and bottom
The pop up is a 1" X 11" piece of cardstock scored 2-3/4" from each end and also at 5-1/2" The plain heart at the bottom is a cute place to sign the card.
The third card is a skinny card to go in a 3-5/8" x 6-1/2" envelope. I liked the way the words fit in the space. Again I put adhesive sheet on the back before cutting the words and it made it very easy to place and stick the words just where I wanted them. The frame is stamped with a texture stamp from the Woven Heirlooms set with Cherry Cobbler ink on Cherry Cobbler paper.
This one has a simple box made with a strip of paper 1-1/2" wide for the pop up.
I added a piece of DSP to both sections of the card before adhering the pop up box.
Turn the paper 1/4 turn. Using the SCORING blade score from one end of the cut to the other cut. Flip the paper and do this on the other side.


No comments:
Post a Comment