 |
| To learn more about the "Crew" click on the banner! |
Things are hopping with the Stamp Review Crew today as we are using the adorable Kangaroo and Company stamp set!
 |
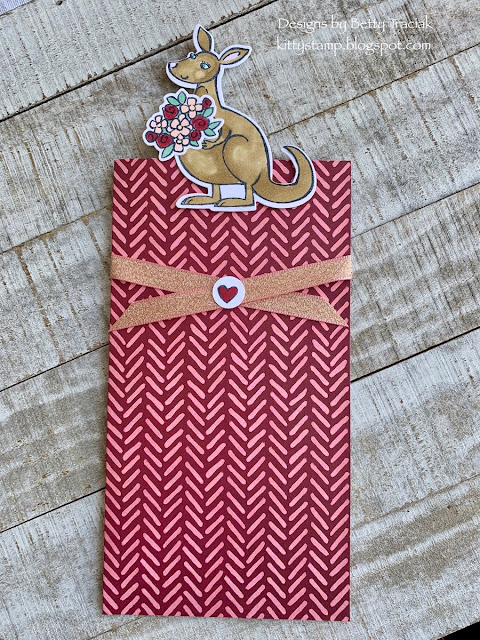
To go along with fun feel of this set I decided to make a long narrow pullout card that fits in a standard business envelope. The colorful sleeve is made from the Field and Flower Designer Series Paper. It is cut 7" X 7-1/2" and scored in half at 3-3/4. TIP: Use a thin line of Tombo Glue on two edges to form the pocket. Make sure the glue is close to the edge and use the glue very sparingly.
There are oodles of little images and phrases in this set and I thought it would be cute to stack some of them so they are revealed one by one as the card is pulled out.
 |
| The Stamparatus was super helpful in getting the alignment right. |
 |
| This one is a birthday card... |
 |
| ...made with love! |
The white insert is made with a partial diecut at the top. Then the upper body of the kangaroo is glued on so that the bottom remains free to slip over the top of the sleeve. (Scroll down to the bottom of the post for a visual of how this is done.)
And I made a change to the kangaroo's expression. The stamped kanga has her eyes closed. I used a Basic Black Stampin' Write Marker to draw in upper eyelids and eyelashes. Isn't she a blue-eyed cutie?
Thanks so much for hopping by! Your next stop is the very talented Cindy Elam!
 |
| This way to Cindy's Blog! |
 |
| This way to Charlet's Blog! |
To make a partial die cut, place the top cutting plate at the place you wish the cut to end. Run it through the die cut machine.
Cut up to the diecut either with scissors or by placing it in the Paper trimmer. Glue the top portion of the stamped, colored and die cut image to the top portion of the insert leaving the bottom free so it slips over the outside of the pocket.


I don't know what is cuter....the fancy fold or the blue eyes! Adorable card and so creative!
ReplyDeleteI agree with Linda. lol the blue eyes just make it adorable.
ReplyDeletegolden goose
ReplyDeletegolden goose
golden goose outlet
kobe shoes
supreme
off white clothingoutlet
yeezy boost 350
off white hoodie
kyrie 7 shoes
jordan travis scott
palm angels
ReplyDeletekyrie 6 shoes
off white
golden goose outlet
kyrie shoes
jdfgnhhk958
ReplyDeletesupreme outlet
golden goose outlet
golden goose outlet
golden goose outlet
golden goose outlet
golden goose outlet
golden goose outlet
golden goose outlet
golden goose outlet
golden goose outlet