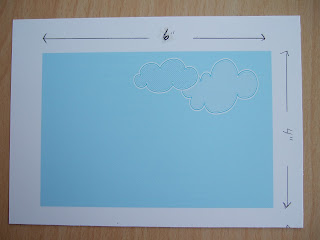
My Digital Studio is great for creating backgrounds for a stamped project. For this project I knew I wanted to use the clouds from the Sunny Day Designer Kit so I chose the color palette of Tempting Turquoise, Pink Passion, Pumpkin Pie, and Old Olive.
For the sky, I wanted a lighter shade of Tempting Turquoise so I simply reduced the opacity. How cool is that?! I love that now I have every SU color in every shade! Just one more thing you can do with MDS that is not possible with traditional materials.
Also, I did not have any designer paper that I liked for the hills in my stash - so I created them on MDS! Here is the complete tutorial to make this project:
1. Open a new project in My Digital Studio. Choose Photo Album - 8-1/2” X 11” Portrait-Create Your Own. After naming project select Blank Page.
2. For sky background piece add the 1.25 Square Punch to the page from Punches in the Resource Palette. Resize punch to 4” X 6”. Color Fill with Tempting Turquoise and reduce opacity to 32. From Embellishments choose Designer Kits - Sunny Day - elements. Add two clouds to upper right corner. Resize clouds (Striped cloud: width -93, height - 51. Solid cloud: width - 111, height - 80.)
4. Print on Whisper White cardstock. Cut out each rectangle leaving a white border for adhering to frame mat.
I have more tutorials in the works. To see past My Digital Studio Tutorials click here.
One more tip for today. Make sure your ink pads are well-inked. I was having trouble stamping the owl for this project. The stamp was new so I did all the usual tricks for conditioning a new stamp: cleaning it with Staz-on cleaner, lightly sanding etc. Nothing worked. Finally it dawned on me to try re-inking the pad. The image on the right is what they looked like prior to re-inking. What a difference! Something so simple but easily forgotten.
Supplies:
Stamps: Love Bandit
Paper: Whisper White, Pink Passion, Pumpkin Pie, Tempting Turquoise, Old Olive, Soft Suede
Ink: Chocolate Chip (Classic), Old Olive (Craft)
Adhesive: SNAIL, Sticky Strip, Tombow Multi Purpose Adhesive
Accessories: My Digital Studio, Stampin’ Write Markers - Pink Passion, Pumpkin Pie, Tempting Turquoise, Blush Blossom, Punches - 3/4” Circle, Word Window, Trio Flower, Stampin’ Dimensoionals, purchased frame (4” X 6” opening).


No comments:
Post a Comment