Welcome to the
Stampin' Addicts 2011 Holiday Mini Blog Hop. If you have been hopping along in order, you just had the treat of seeing
Holly's Stocking Punch projects. I am so glad I have that punch so I can try Holly's great ideas!
For my projects I am featuring the Peekaboo Frames Bigz XL Big Shot die. This nifty new die has five mini frames with attached centers that can lifted to reveal what is underneath. My first project uses it in this traditional manner.
The ghost is hidden under the little lift-the-flap cover. I printed the white layer with the sentiment and the ghost using My Digital Studio and added the round frame on top. The ghost is from the Holiday Blitz digital stamp set which comes with the MDS software - no extra download needed!
For my next project I bent the centers backwards so they formed stands for the frames.
Each of these miniature frames now can stand alone and they make a perfect place to show off tiny works of art. The circle frame art has a background of diluted reinker colors on watercolor paper. Once it was dry I stamped the "Create" and the tiny little butterfly. The frame on the right has a medallion design with pearl accents. The largest frame (still very petite!) has roses made from white taffeta ribbon that I dyed with reinkers and twisted to form the flowers. See the stem and leaves? They are outlined with the new Dazzling Details iridescent glitter glue. Really pretty in person!
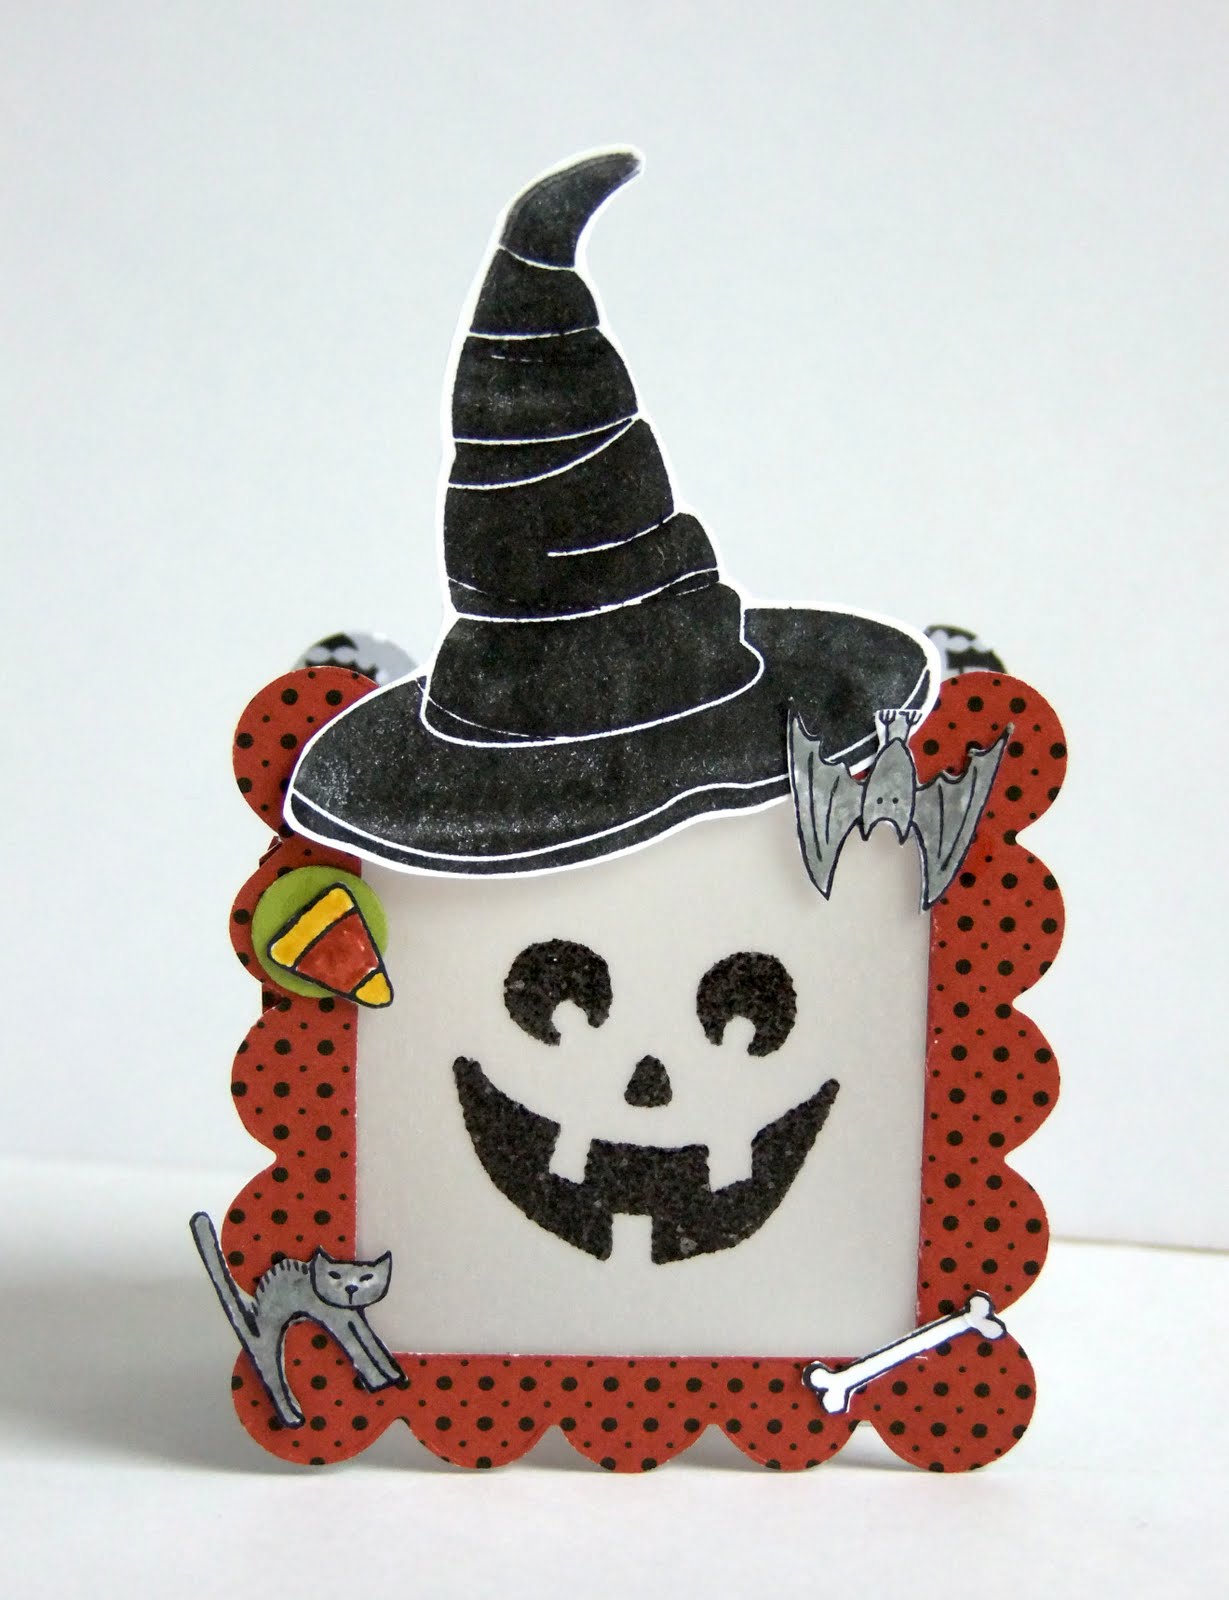
Next up is another Halloween project- a mini luminary.
This uses two of the scalloped frames. The centers are bent backwards and scored to form a two-sided luminary. Vellum cardstock lets the light show through. The cute pumpkin face and hat are from the Jack Of All Trades stamp set in main catalog and the teeny tiny images are from the new Festive and Fun set in Holiday Mini. I will have more pictures to explain how this is made on Monday.
And last is a retirement card. I used the double-windowed die cut to make a pop-up beach chair.
I took the piece and flipped the middle to the outside to make the back and seat. Then I lightly creased the thin strips to form the arms of the chair. This one is a bit hard to describe so if you are interested I will have a tutorial on Monday. The umbrella is made with the pennant and boho blossom punches and the purse is made with the cupcake punch.
EDITED: The details of the first 3 projects can be found in
THIS POST and the pop-up beach chair tutorial can be found
HERE.
Now it is time to hop on over to
Paula's blog to see her projects featuring the "25 and Counting" stamp set. Have fun!!


WOW! I was excited about the peekaboo frames just for the frames, I can't believe how creative you are with them! TFS!
ReplyDeleteGreat cards! that pop up is amazing and i love that little ghost!!
ReplyDeleteOMGosh! Way to think outside the box!! I will be back to check out the "how she did that's" this week!
ReplyDeleteOh my how fun are these?? Love them!!
ReplyDeleteSo sweet! I lovethe summer card. I can't wait to see the tutorial on the summer beach chair.
ReplyDeleteTer ;)
I never would have thought of these! Great inspiration.
ReplyDeleteSuch fun ideas with this die. It's going on my next order for sure! Thanks for sharing your projects on the blog hop!
ReplyDeleteBetty, these projects are so amazing! The beach chair is just over the top!
ReplyDeleteHow creative! Love the luminary and beach scene.
ReplyDeleteBetty - these are awesome! I was hoping to see more "out of the box" ideas with this die before I purchased it. SOLD!
ReplyDeleteI'm amazed at all your great ideas! Wow! Thanks for sharing!
ReplyDeleteHoly cow! Where did you come up with these ideas? They are FANTASTIC!! Love them!
ReplyDeleteFantastic job, love the new peekaboo frames. Thanks for sharing.
ReplyDeleteI really love the "frame frames" -- such a great idea for mini projects! However, that first card is my fave!
ReplyDeleteI have been so anxious to see what you'd do with this die, and girl you just blew me outta the water!! So very creative!! Can't wait for the pop up card tute!
ReplyDeleteBetty, these are fabulous! I too have been anxious to see what you would come up with. LOVE the beach chair!
ReplyDeleteI love your creative ideas! Awesome way to use those frames!
ReplyDeleteWow!! How very creative and clever of you to come up with these darling designs. I am on the fence about this die, but you are really swaying me with "other" ways to use it. Thanks for sharing your ideas.
ReplyDeleteThey are all cute, but that ghost is amazing!!! I think I will CASE it for a class, so that I have a reason to talk about MDS with my customers. And the frames--Stinkin' Cute and fabulously creative!!
ReplyDeleteWhat brilliant ways to use this die!! I love the beach chair!! You are so clever!
ReplyDeleteThese are awesome projects!!! The retirement card is real art! I can't wait to see the tutorials!
ReplyDeleteGreat projects. The little Halloween luminary is just darling!
ReplyDeleteWow!! Clever and very cute!!! I will need this die now for sure!! lol
ReplyDeleteThis is pure genius!! I was on the fence with these and now I can see so many applications! Thanks so much for such wonderful work!
ReplyDeleteSo clever! I love the boo card.
ReplyDeleteKim
Adorable stuff! I love the beach chair idea best!! Just great.
ReplyDeletepalm angels outlet
ReplyDeletea bathing ape
bape hoodie
supreme new york
jordan shoes