Today I have the tutorial for the flower pot shaped gift card holder I designed using the Paper Blooms Designer Series Paper. This project is perfect for papers with large designs that can be cut out. Stamped flowers would be pretty too!
 |
| The large flowers on the Paper Blooms DSP were my starting point for the flower pot design. |
I made another version using the Berry Blessing DSP- another Sale-a-bration offering. The strawberries are just the right the size for the flower pot!
 |
| A small modification for this version: Shorten the top flap one inch as noted below. |
FLOWER POT POP-UP GIFT CARD HOLDER INSTRUCTIONS
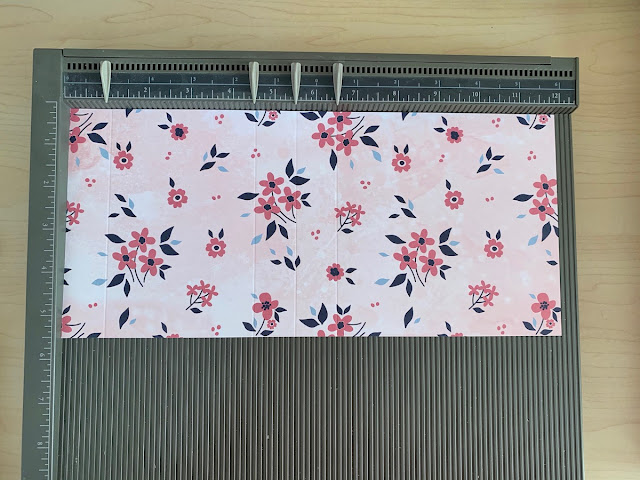
STEP 1: Score a 5-1/2" X 12" piece of Designer Series Paper at 1", 4-1/2", 5-1/2" and 6-1/2". ( For the strawberry version start with a 5/1/2" X 11" piece of DSP.)
STEP 2: Fold with valley, mountain, valley, mountain folds as shown.
STEP 3: Holding the paper in the folded position make pencil mark 1/2" from each side at the bottom.
STEP 4: Cut away the small triangles from the pencil dot to top of the flowerpot. (You can use scissors or a guillotine style cutter that cuts through multiple layers.)
STEP 5: Apply Tear & Tape adhesive to the outer edges and along one side near the fold. (The adhesive goes on the side of the paper that will be the outside of the card holder.) Peel and stick the inner folds together.
STEP 6: Mark the width of the gift card you will be using with pencil dots on the fold.
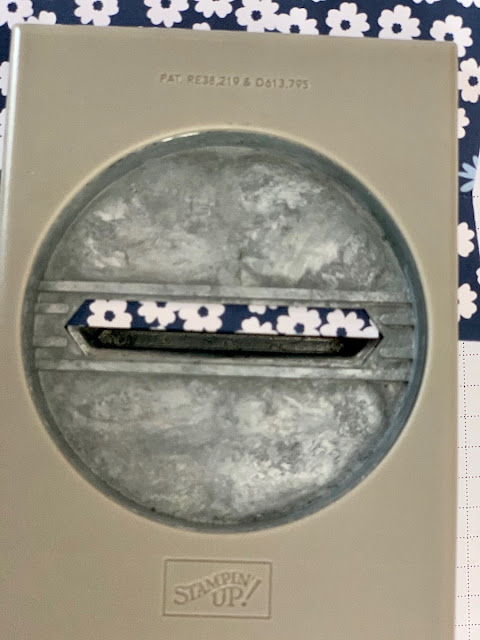
STEP 7: Using the Classic Label Punch punch from dot - to - dot on the fold.
Align the punch so that one half of the punch is on the fold.
STEP 8: Adhere the front flap of the flower pot.
STEP 9: Cut a 1" X 2" rectangle away from each side at the back of the holder. (For the strawberry version this will be a 1" X 1" rectangle).
STEP 10: Apply Tear & Tape to one edge of a 2-1/2" by 3-1/4" piece of cardstock. (For the strawberry version use a 1-1/2" X 3-1/4" piece of cardstock.)
STEP 11: Adhere the piece of cardstock to the holder with the Tear & Tape at the top edge. The bottom edge remains free creating a flap to keep the holder closed. Adhere the flowers (or the strawberries) to this piece of cardstock.
STEP 12: Leave me a comment if you like this tutorial!


No comments:
Post a Comment