Sunday, January 17, 2021

Stamp Review Crew: Art Gallery Edition


Hello and welcome to the latest Stamp Review Crew Blog Hop!   Our international crew highlights one Stampin' Up stamp set on each blog hop.  Hops are the first and third Mondays of the month and are a great way to get lots of ideas for using a set!   Click on the banner below to see a complete list of Crew members and see all the past hops which we keep active.  So many creative things to see and enjoy!


We are using the Art Gallery stamp set for this edition.  It is a three step stamp making the shading easy as can be.  Because I wanted to try using the Gilded Leafing Embellishment, I chose the rich color scheme of Merry Merlot and Cherry Cobbler to complement the gold. 


It is a hard to capture just how pretty this is in a picture.  I like this one so much that I am keeping it as a decor piece on my piano. 


The gold gilding really adds an elegant luster.  The center is stamped with VersaMark Ink and then Heat & Stick powder provides the necessary tackiness for the gilding.  Tear & Tape can also be used to adhere the gilding.  I experimented to see if Tear & Tape plus ribbon would work and it turned out wonderfully!  I just stuck a piece of Tear & Tape along the middle of the ribbon and rubbed the gilding on.  The resulting ribbon is completely flexible.


I liked the gilded ribbon so much I decided to make another card with ribbon as a focus.  This time I used the Gorgeous Grape Sheer Ribbon.  

I used a piece of cardstock as the base to weave the ribbons. The ribbons are taped on the back.


So happy you have chosen to hop along with us!  Please click on the buttons below for a gallery of ideas for this stamp set!


This way to Mickey's Blog!


Or this way to Kelly's creations!


Merry Merlot Card
Stamps: Art Gallery
Paper:  Merry Merlot and Basic White Card stock, Forever Gold Laser-Cut Specialty Paper
Ink:  Merry Merlot, Cherry Cobbler, Soft Sea Foam Classic InkVersaMark Ink.  Old Olive Stampin' Write Marker
Accessories:    Flowers for Every Season Ribbon Combo Pack, Gilded Leafing Embellishment, Tear & Tape Adhesive,  Stampin' Dimensionals, Tombo Glue
Big Shot:   Floral Gallery Dies

Gorgeous Grape Card
Stamps: Art Gallery
Paper:  Gorgeous Grape, Highland Heather and Basic White Card stock
Ink:  Gorgeous Grape and Highland Heather Classic InkVersaMark Ink. 
Accessories:    Gorgeous Grape Sheer Riibbon, Gilded Leafing Embellishment, Tear & Tape Adhesive,  Mini Glue Dots
Big Shot:   Floral Gallery Dies

Saturday, January 16, 2021

Flower Pot Pop-Up Gift Card Holder Tutorial


Today I have the tutorial for the flower pot shaped gift card holder I designed using the Paper Blooms Designer Series Paper.    This project is perfect for papers with large designs that can be cut out.  Stamped flowers would be pretty too!

The large flowers on the Paper Blooms DSP were my starting point for the flower pot design. 


I made another version using the Berry Blessing DSP- another Sale-a-bration offering.  The strawberries are  just the right the size for the flower pot!

A small modification for this version:  Shorten the top flap one inch as noted below.


FLOWER POT POP-UP GIFT CARD HOLDER INSTRUCTIONS


STEP 1:  Score a 5-1/2" X 12" piece of Designer Series Paper at 1", 4-1/2", 5-1/2" and 6-1/2". ( For the strawberry version start with a 5/1/2" X 11" piece of DSP.)


STEP 2:  Fold with valley, mountain, valley, mountain folds as shown.


STEP 3: Holding the paper in the folded position make pencil mark 1/2" from each side at the bottom.


STEP 4: Cut away the small triangles from the pencil dot to top of the flowerpot.  (You can use scissors or a guillotine style cutter that cuts through multiple layers.)


STEP 5:  Apply Tear & Tape adhesive to the outer edges and along one side near the fold.  (The adhesive goes on the side of the paper that will be the outside of the card holder.)  Peel and stick the inner folds together.


STEP 6:   Mark the width of the gift card you will be using with pencil dots on the fold.


STEP 7: Using the Classic Label Punch punch from dot - to - dot on the fold. 


Align the punch so that one half of the punch is on the fold. 


STEP 8:  Adhere the front flap of the flower pot.


STEP 9: Cut a 1" X 2" rectangle away from each side at the back of the holder.  (For the strawberry version this will be a 1" X 1" rectangle).


STEP 10:  Apply Tear & Tape to one edge of a 2-1/2" by 3-1/4" piece of cardstock.  (For the strawberry version use a 1-1/2" X 3-1/4" piece of cardstock.)


STEP 11:  Adhere the piece of cardstock to the holder with the Tear & Tape at the top edge.  The bottom edge remains free creating a flap to keep the holder closed.  Adhere the flowers (or the strawberries) to this piece of cardstock.

STEP 12:  Leave me a comment if you like this tutorial!


Paper: Berry Blessings Designer Series Paper, Basic White cardstock
Punches:   Classic Label
Accessories:   Tear & Tape Adhesive, Flowers for Every Season Ribbon Combo Pack


Sunday, January 10, 2021

Stamp Review Crew: 2021 Sale-a-bration Bonus Hop

 
The Stamp Review Crew has a bonus hop this month!   The format is a little different for this hop. Instead of each member creating with the same stamp set as we usually do this time we are all using different Sale-a-bration products.   As always though we are archiving the hop for future reference. Please click on the banner below to see past hops and to check out the bios of the crew members.


There are FOUR different paper selections offered for the current Sale-a-bration so I thought it would be fun to focus on one of those for my project.   I think the large flowers on the Paper Blooms DSP are very pretty so I designed this flower pot shaped pop-up gift card holder to show them off.

The flowers are adhered to a separated flap to keep the holder closed.  I will have a tutorial with all the measurements and directions soon!  EDIT:  Click HERE for the tutorial.

This would be great with stamped flowers too!
 
 
Coffee and flowers would make someone's day!


EDIT:  The TUTORIAL can be found HERE!

So glad you have stopped by!  To continue the hop please click on the buttons below to see more projects by the talented Crew members featuring the new Sale-a-bration freebies!

Click to see Mike Funke's project!


Or here to see Heidi Baks creation!


Stamps: So Sentimental 
Paper: "Paper Blooms Designer Series Paper, Basic Black cardstock
Ink:  Night of Navy Classic Ink
Punches:   Classic Label, Lovely Labels Pick a Punch
Accessories:   Tear & Tape Adhesive

Sunday, January 3, 2021

Stamp Review Crew: So Sentimental Edition


Welcome to the first Stamp Review Crew blog hop of 2021!  We are excited to begin the new year with great ideas for the all occasion stamp set So Sentimental.     

To learn more about our international crew please click on the banner above to be taken to our SRC website.  There you can see archives of past blog hops - a tremendous resource of ideas!


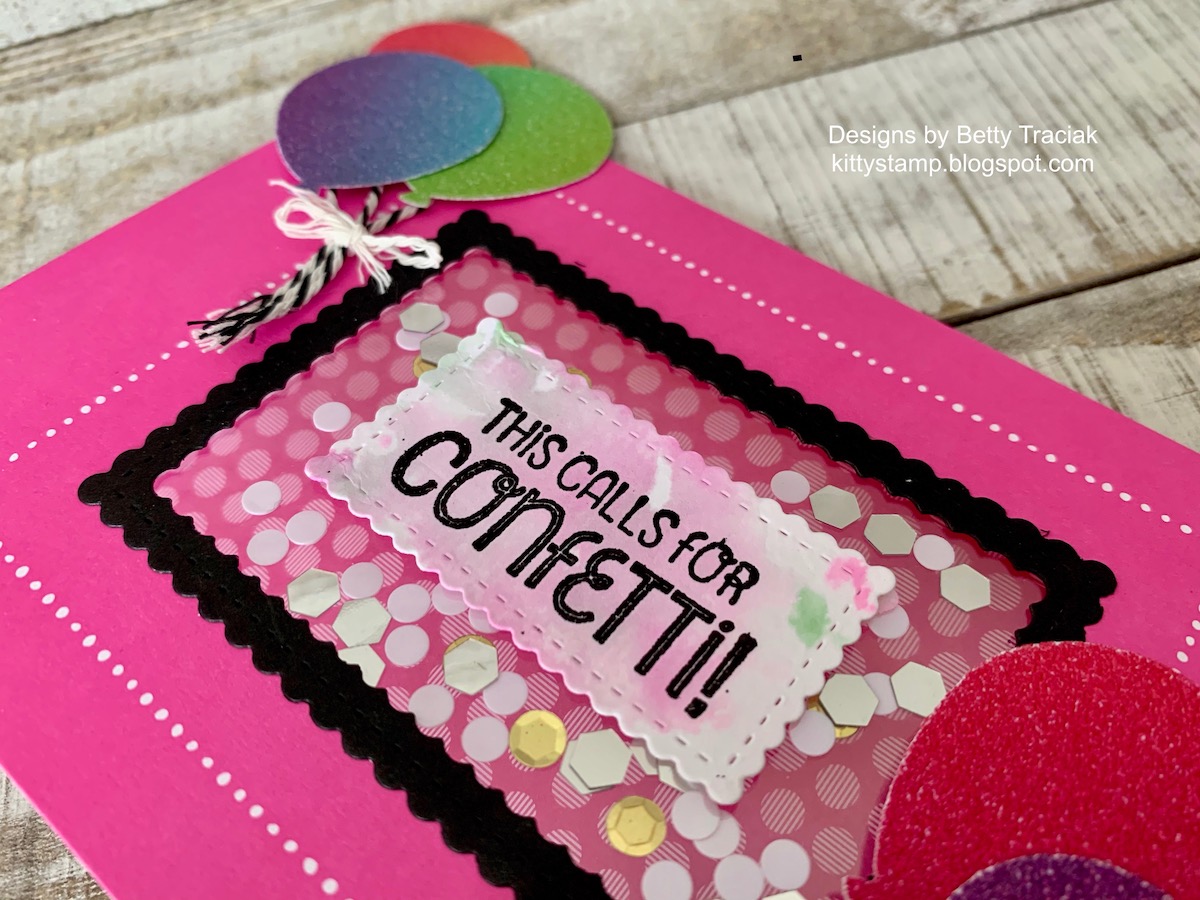
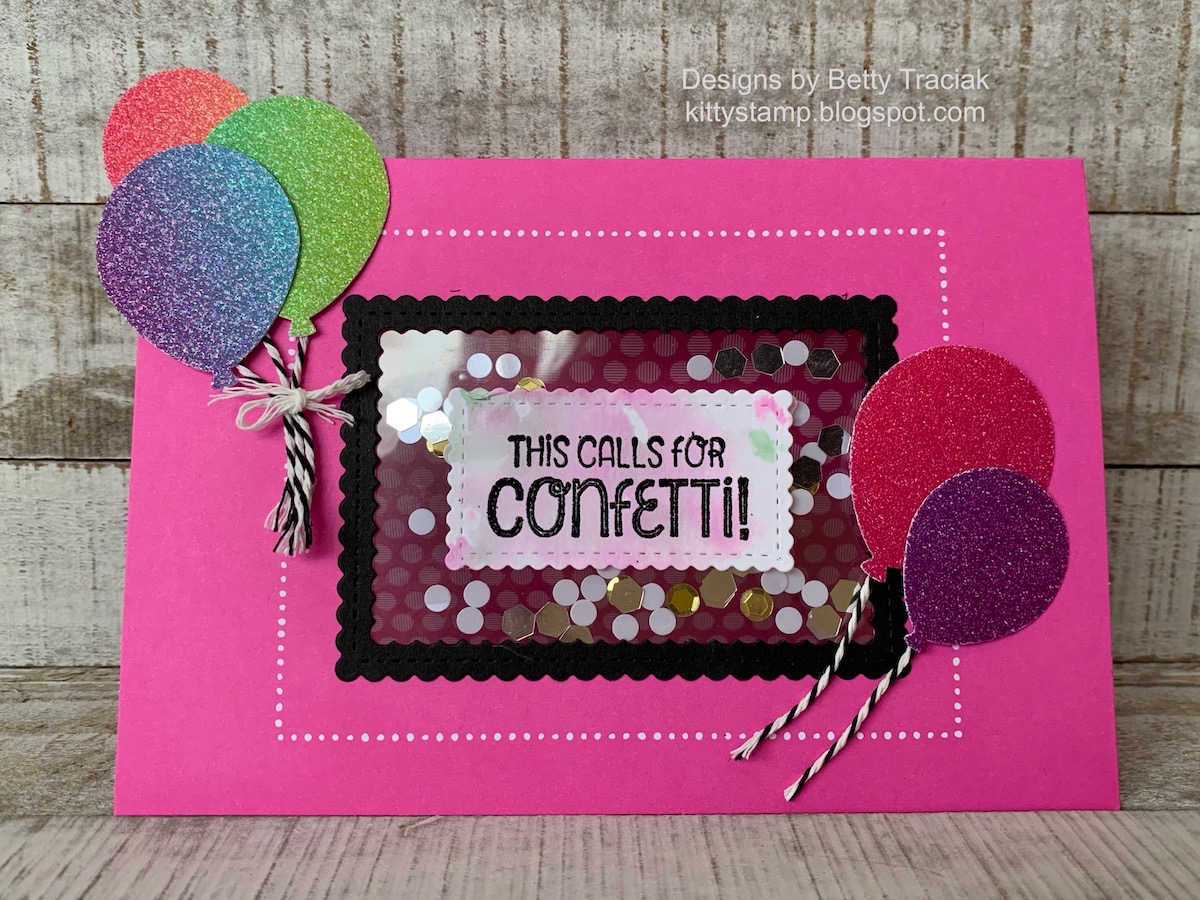
To kick off 2021 we need some confetti!  

Rainbow Glimmer Paper is bright and happy!  
I thought the Magenta Madness Memories and More card looked like the top of a cake box.

Sequins are sandwiched between two pieces of Window Sheet acetate. 

 
The matching Stitched So Sweetly dies are going to be a long lasting fav!
 

Thank you for joining us for So Sentimental blog hop!  Please click on the the buttons below to see more awesome creations!

To Mary Haugen's pretty projects!

To Mike Funke's marvelous blog!


Stamps: So Sentimental
Paper:  Basic Black and Whisper White Card stock, 2020-2022 In Color 6" x 6" Designer Series Paper
Ink:  Magental Madness and Granny Apple Green Classic Ink. VersaMark Ink
Punches:  Balloon Bouquet
Accessories:   Rainbow Glitter Paper, Flowers for Every Season Memories and More Cards and Envelopes, Sequins for Everything, Playful Pets Trim Combo Pack, Window Sheets, Tear & Tape Adhesive,  Stampin' Dimensionals, Tombo Glue
Big Shot:   Stitched So Sweetly Dies


Monday, December 21, 2020

Trimming the Town Mini Ornaments


Merry Christmas!  Just a quick post to wish you the very best this holiday season.   May you be warm and well where ever you are.   

This is a different year not seeing as many family and friends as usual.  I made these little ornaments to send in the mail to a family member to decorate a tiny potted Christmas tree.   Thankfully the packages we sent have arrived in time for Christmas.  

The mini ornaments are double sided.  Identical on each side with the ribbon sandwiched in between.

We are grateful for those that have been working to deliver packages.  We put out a few snacks as a thank you.  I still use Stampin' Up's long retired My Digital Studio images for graphics and digital scrapbooking.  The cute images that were a part the program are still my favorites!


Paper:   Whisper White, Real Red, and Midnight Muse Card stock, Trimming the Town Designer Series Paper
Markers:  Pool Party, Poppy Parade, Old Olive and Soft Suede Stampin' Blends Markers.
Accessories: lPlayful Pets Trim Combo Pack, Tombo Glue
Punches: Timeless Label, 1" and 1-1/4" Circle (retired), Small oval punch (retired)

Sunday, November 15, 2020

Stamp Review Crew: Coming Home Edition


Welcome to the latest Stamp Review Blog Hop.  We are a group of Stampin' Up Demonstrators from around the globe.   Every first and third Monday of the month we host a hop featuring a different stamp set.  This is a great way to see a bunch of projects in a variety of styles.  One stamp set,,, so many ideas!

We have the past hops archived on the Stamp Review Crew website.  Please click on the banner below to see all the creative goodness!


This time we are featuring the cozy Christmas stamp set Coming Home.   The coordinating Trimming the Town Designer Series paper really is a fun addition to the stamp set.   I used the snow scene as a backdrop for a candy box.

The base of the box is a 6" X 9" piece of cardstock that is scored 1-1/2 inches on all sides.  I used heavy whisper white cardstock as it is nice and sturdy.  

The background is the top half of one of the DSP sheets (6: x 12") with a quick hand cutting along the top edge.   The paper is scored at 3" and 9" to fit inside the box.


The images are colored with Stampin' Blends

Is it "NO PEEKING" or "NO PARKING" ??


All the cute little leftovers made into tags and gift enclosure cards.
The Timeless Label Punch is the perfect size for the images.

So glad you have stopped by!  To continue the hop please click on the buttons below to see more Coming Home projects!


This way to Mike's Blog!


This way to Heidi's Blog!
  

Stamps: Coming Home
Paper:  Trimming the Town Designer Series Paper, Whisper White Card stock
Ink:  Memento Tuxedo Black Ink
Markers:  Pool Party, Poppy Parade, Old Olive and Soft Suede Stampin' Blends Markers.
Accessories:  Flowers for Every Season Ribbon Combo Pack, Tombo Glue
Punches: Timeless Label
Big Shot:   Home Together Dies

Sunday, October 4, 2020

Stamp Review Crew: Dry Brush Edition


Welcome to the latest Stamp Review Crew Blog hop!   Our crew consists of a wonderful group of Stampin' Up demonstrators from around the world.  Each session we highlight a single stamp set.  You will love the variety of styles and all the ideas we have to share!  Please click on the banner below to see more info about our crew and to view the archive of past hops.


This session instead of a stamp set the crew is highlighting the great background stamp called Dry Brush. The texture of this stamp is so very versatile.  I used it in two places on my card - on the white inner layer with multiple colors of ink and on the outside layer with tone-on-tone stamping.

For the center layer, I swiped the Dry Brush background stamp with Pool Party and
Highland Heather stamp pads before cutting it with the Celebration Labels die.

You can see up close the detail of the both the outer and inner layers here.  The outer layer is stamped with with Highland Heather and was stamped off once.

Any one who knows me knows I love kitties and loved using Grace's Garden set in combination with the pretty background.


And one more picture of the kitty project in my garden!

So glad you stopped by today!  Please click on the buttons below to continue on with hop.


This way to Mary's marvelous project!


This way to Linda's lovey creation!

Stamps: Dry Brush, Graces Garden
Paper:  Pool Party, Highland Heather  and Whisper White Card stock
Ink:  Pool Party and Highland Heather Classic Ink. Memento Tuxedo Black Ink
Markers:  Pool Party, Minit Macaron, Highland Heather and Petal Pink Stampin' Blends Markers. 
Accessories:  3/8" Pool Party Sheer Ribbon,  Stampin' Dimensionals, Tombo Glue
Big Shot:   Celebration Labels Dies, Garden Gateway Dies